
In this article, I’ll show you how to capture important information in regards to failures in your flow run. This can include workflow variables to create the flow run link, the flow name, and the error message.
 | Time to read: About 20 minutes |
 | Intended for: SharePoint developers who use Power Automate |
 | Key takeaway: In this tutorial I will demonstrate how to collect important information when your flow fails. |
For this tutorial, we will be using Office 365 SharePoint Online and Power Automate.
**Click on any of the images to see a larger view**
Step 1 – Create a new flow
In Power Automate, select “My Flows”, click on the “New flow” drop down, and then click on “Instant cloud flow”: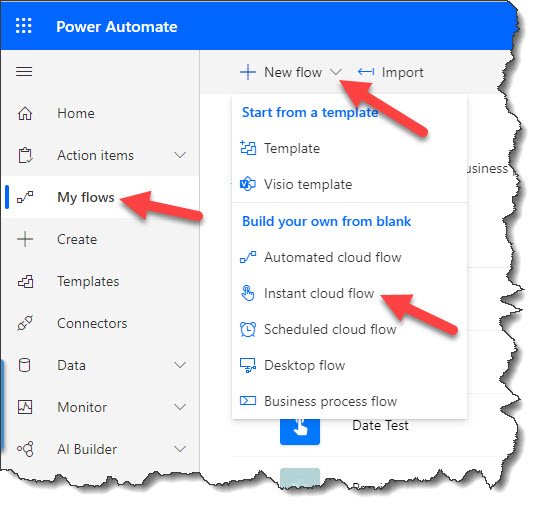
Name the flow “Error Trapping Example”, select “Manually trigger a flow”, and then click on the “Create” button: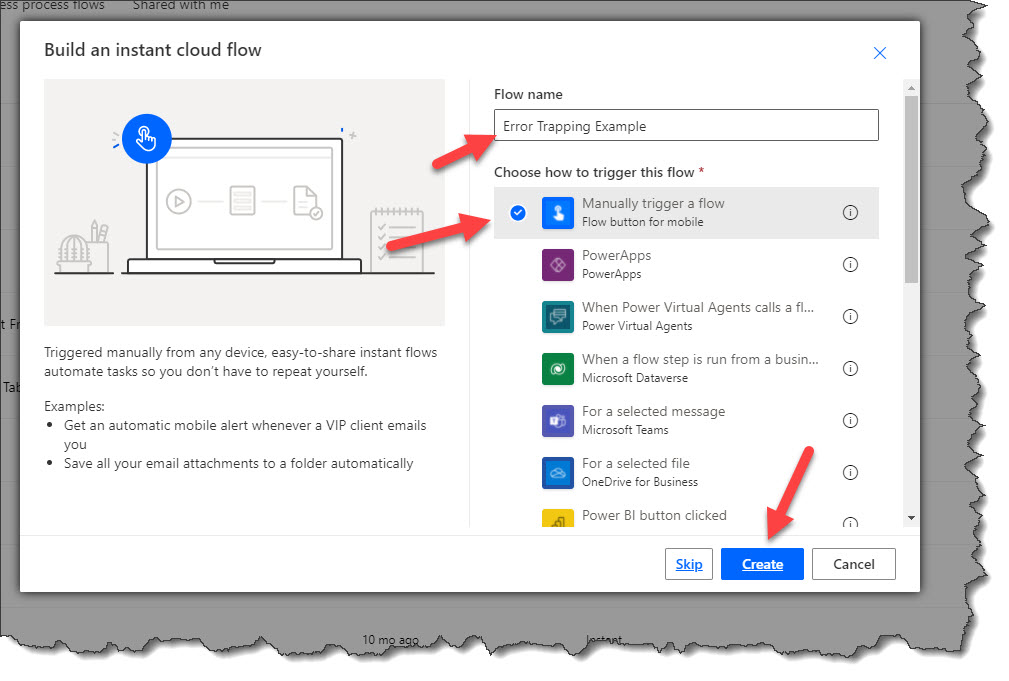
Step 2 – Add actions
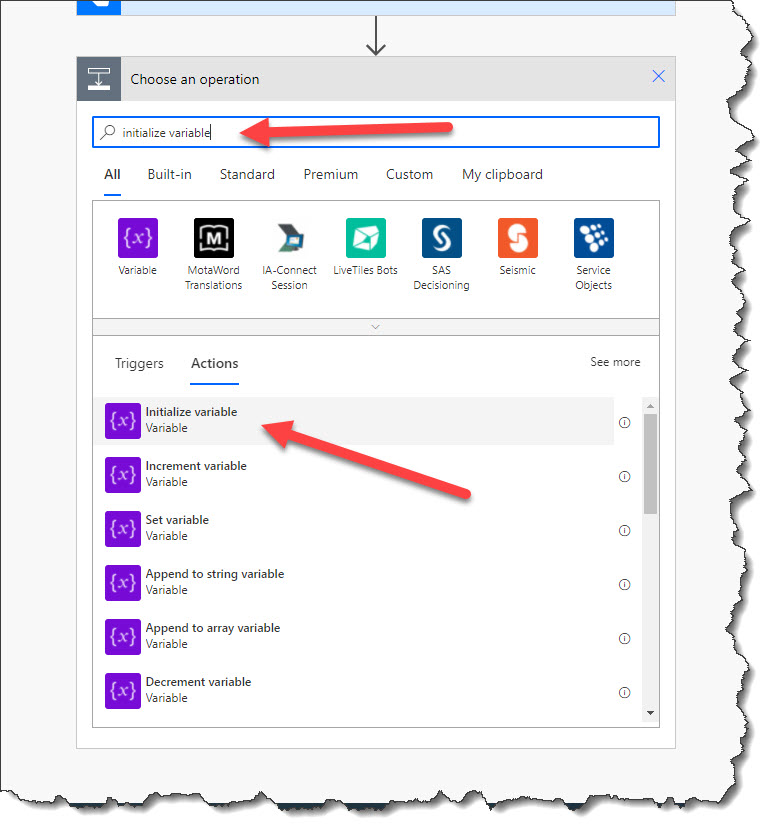
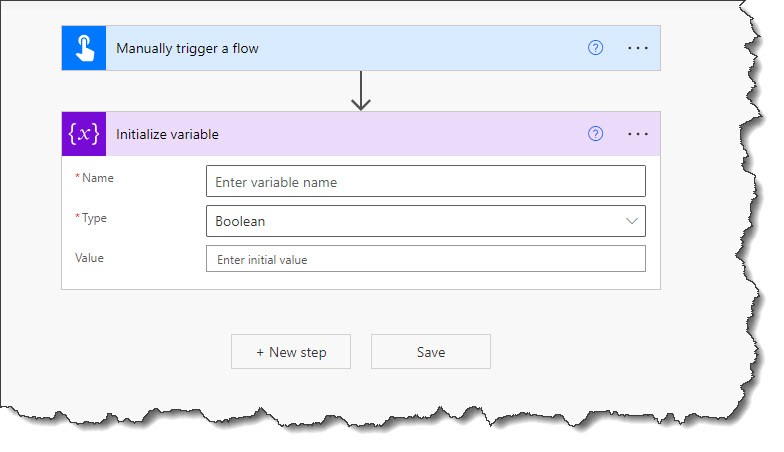
We will be adding a couple variables for this example to force an error for testing. Click on the “+ New step” button, search for the “Initialize variable” action, and add it: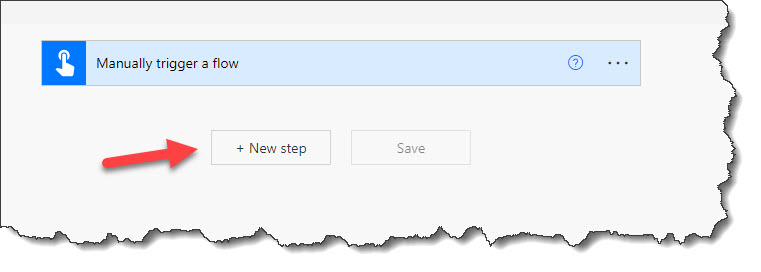
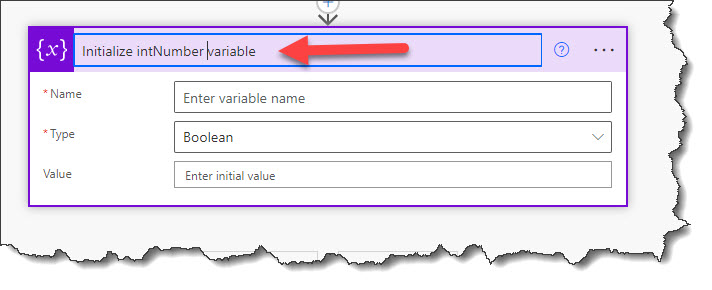
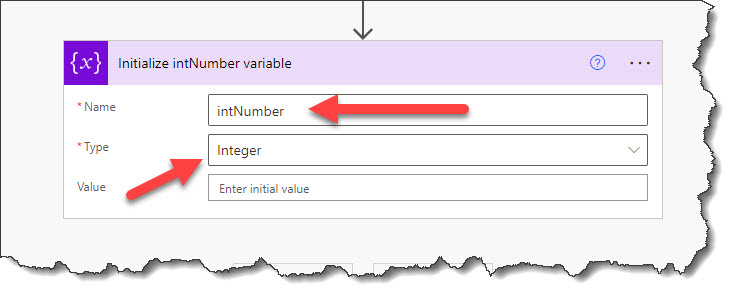
Rename the action “Initialize intNumber variable”, name the actual variable “intNumber”, then set the variable type to “Integer”: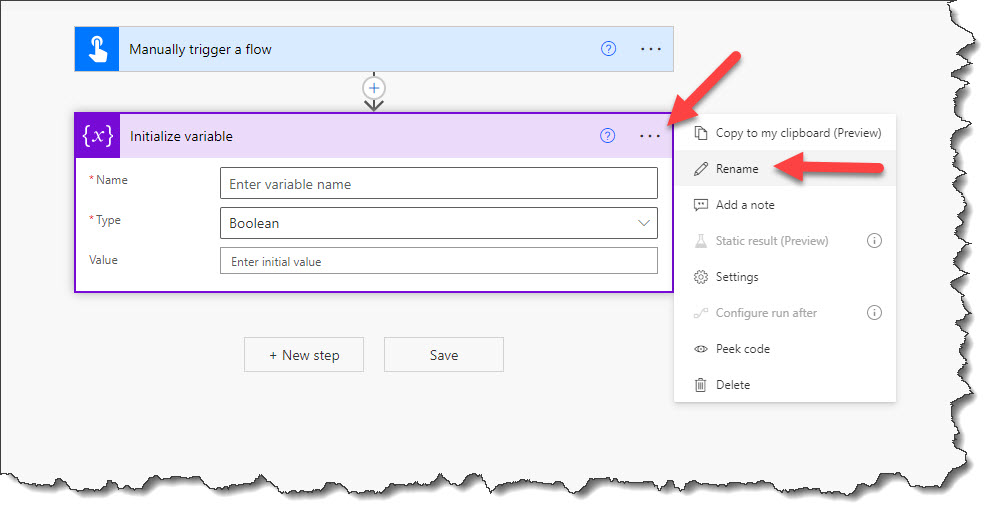
Add a second variable by clicking on the “+ New step” button, search for the “Initialize variable” action, and add it: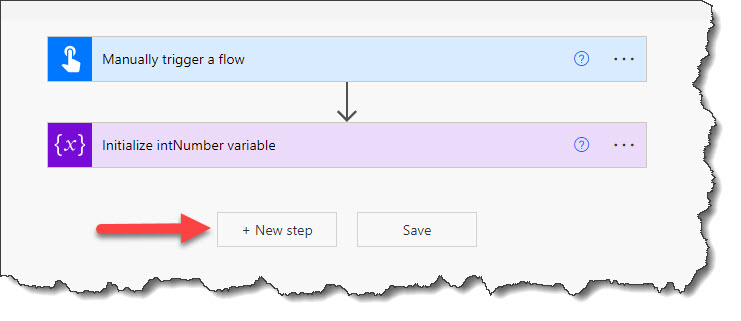
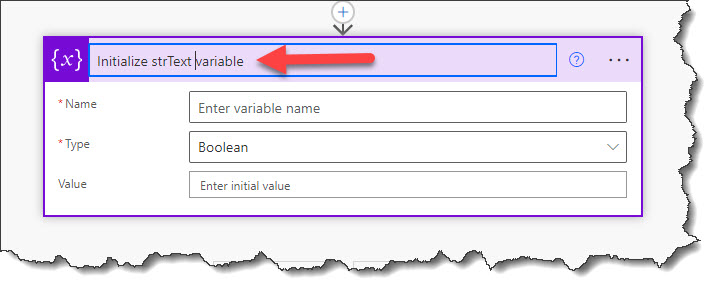
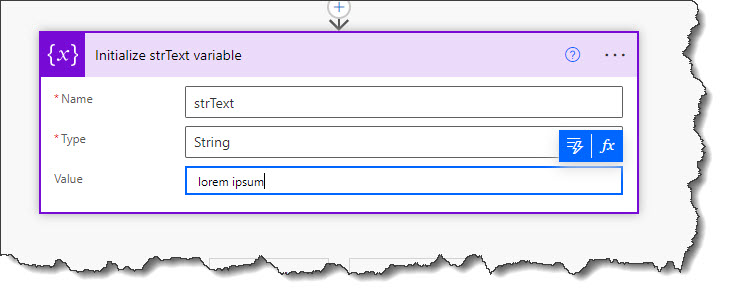
Rename the action “Initialize strString variable”, name the actual variable “strString”, then set the variable type to “String”. Set the Value to whatever text you want. In my example, I set the value to “lorem ipsum”: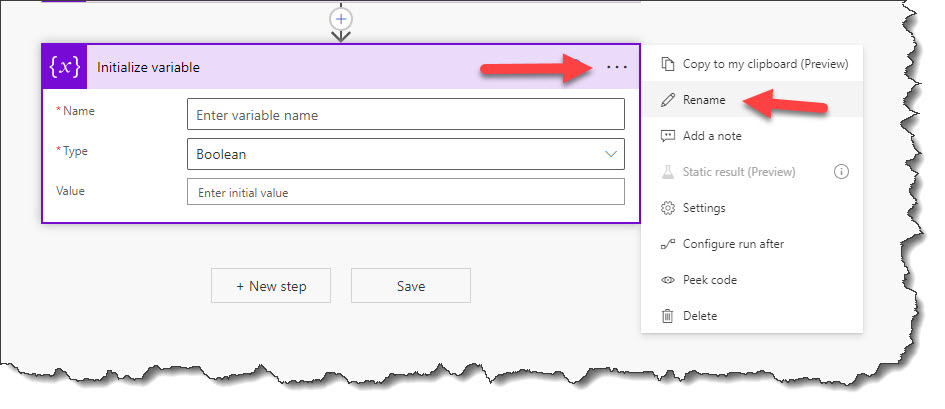
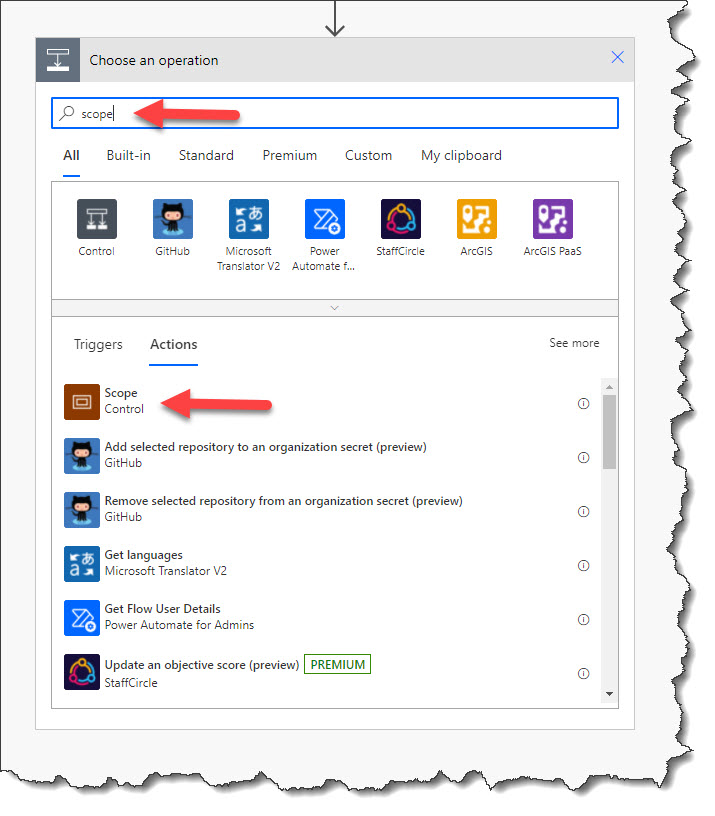
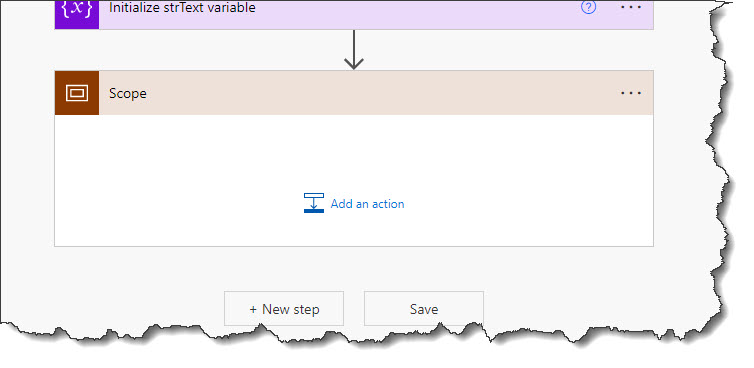
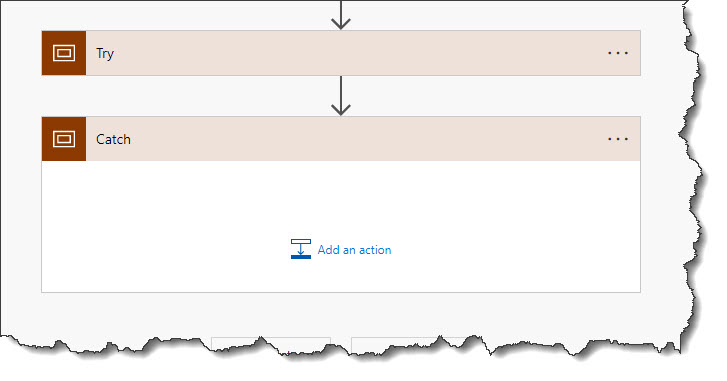
Click on the “+ New step” button, search for the “Scope” action, and then click on it to add it: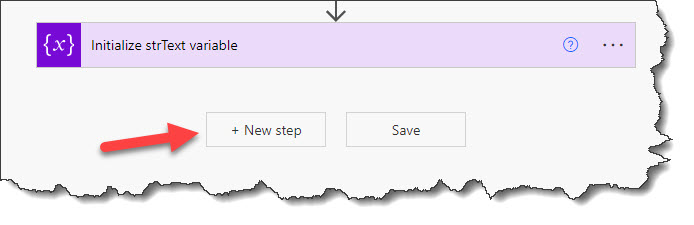
Rename the Scope action the same as you renamed the actions above and rename it “Try”. We are using the standard Try-Catch-Finally error trapping terminology: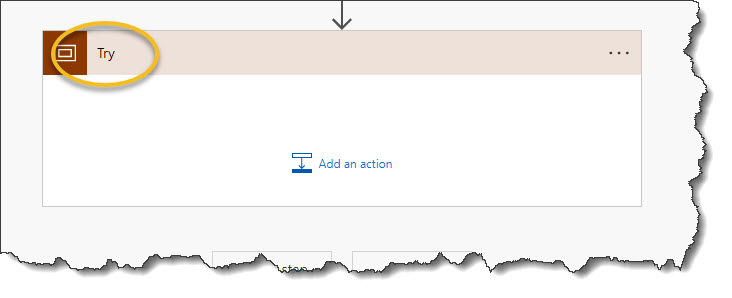
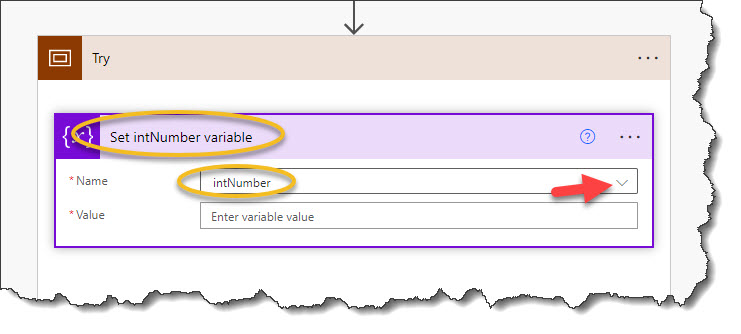
Click on the “Add an action” button and add the “Set variable” action by using the same steps outlined above. Rename the action “Set intNumber variable”, and make sure to select the “intNumber” variable from the drop down menu: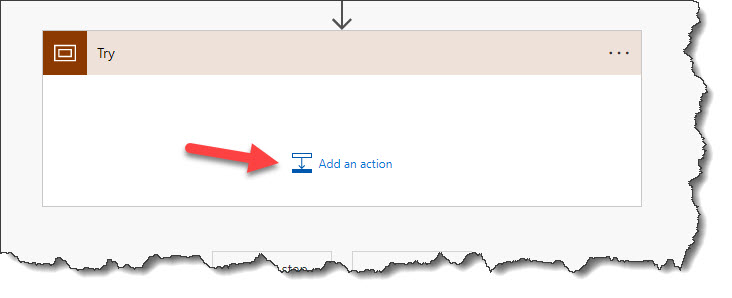
Set the intNumber variables value to the “strText” variable. We will need to do it this way since you cannot directly set the integers value to some text. This step is what will cause our flow to fail on purpose. Click in the “Value” field, then click on the Expression button: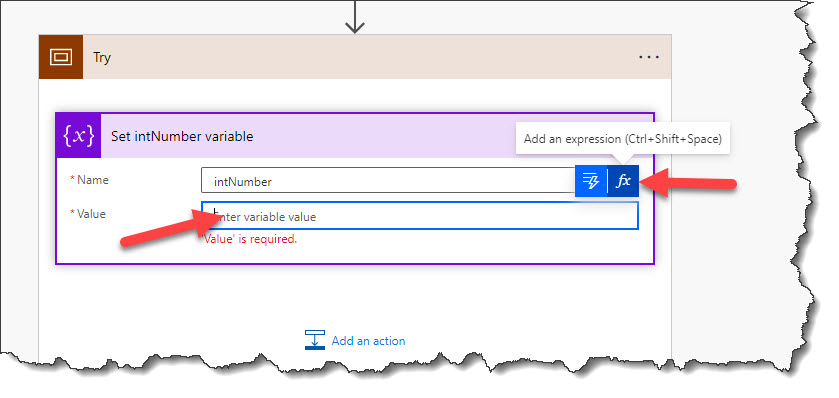
In the expression builder, paste in the following expression. Please note that your expression builder may look a bit different:variables('strText')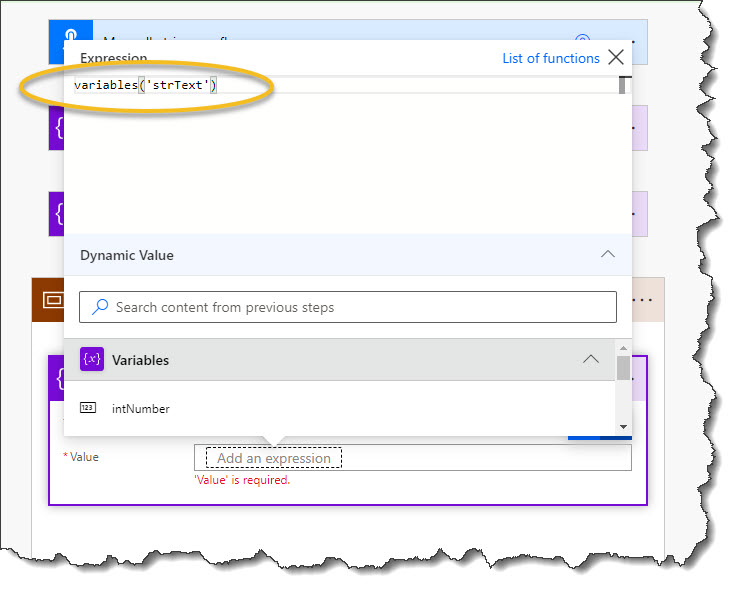
Click on the “+ New step” button, search for the “Scope” action, and then click on it to add it. Rename the new scope action to “Catch”:
Select “Configure run after” by first clicking on the menu for the “Catch” scope: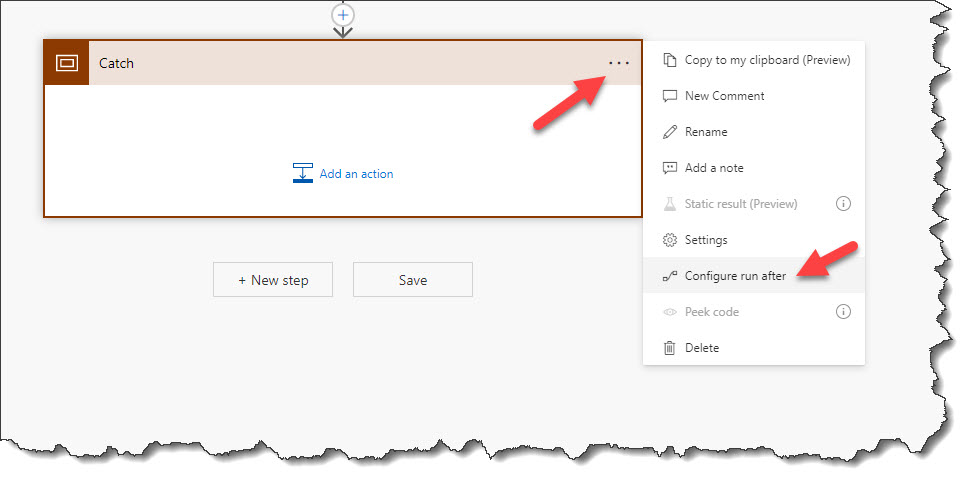
Select “has failed”, then click on the “Done” button. make sure it is the only option selected: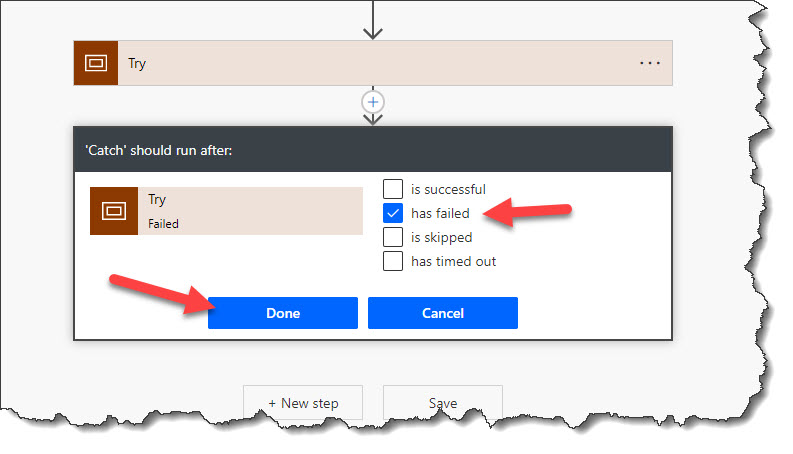
Click the “Add an action” button within the “Catch” scope and add the “Compose” action: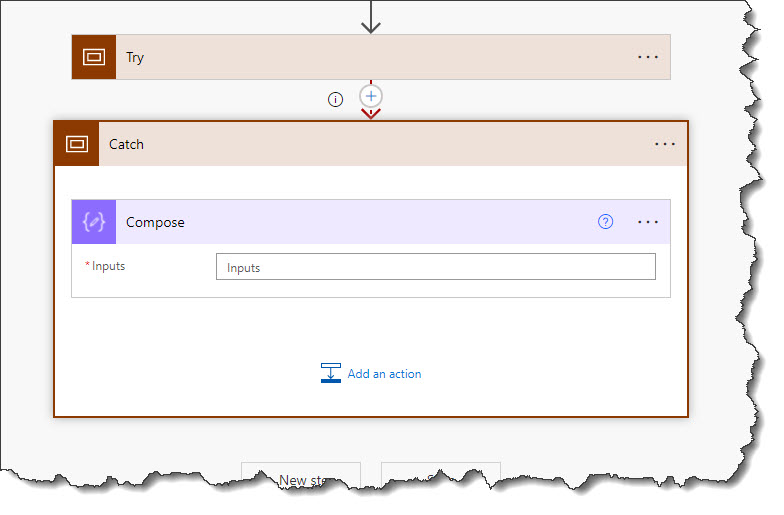
Click in the “Inputs” field, then click on the Expression button. Paste in the following expression. Please note that your expression builder may look different:result('Try')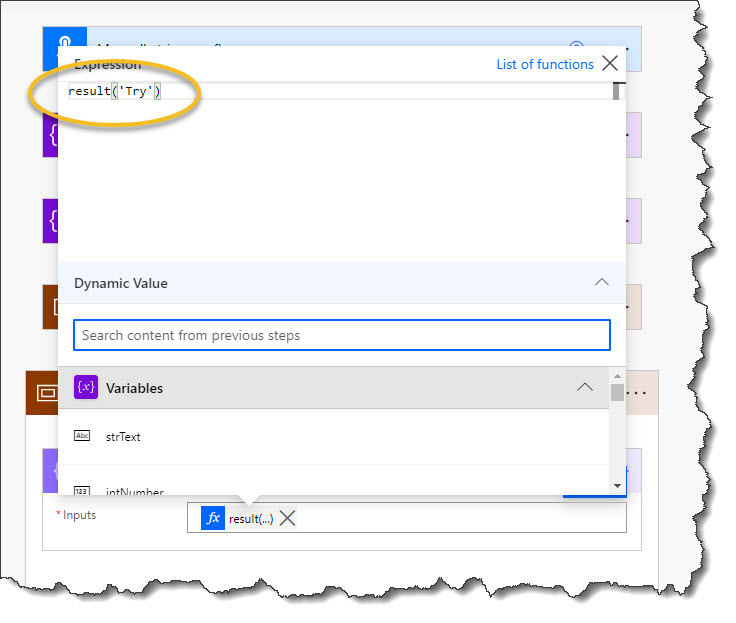
Click the “Add an action” button within the “Catch” scope and add the “Filter array” action: 
Click in the “From” field and select the dynamic content button. Select the “Outputs” from the compose step: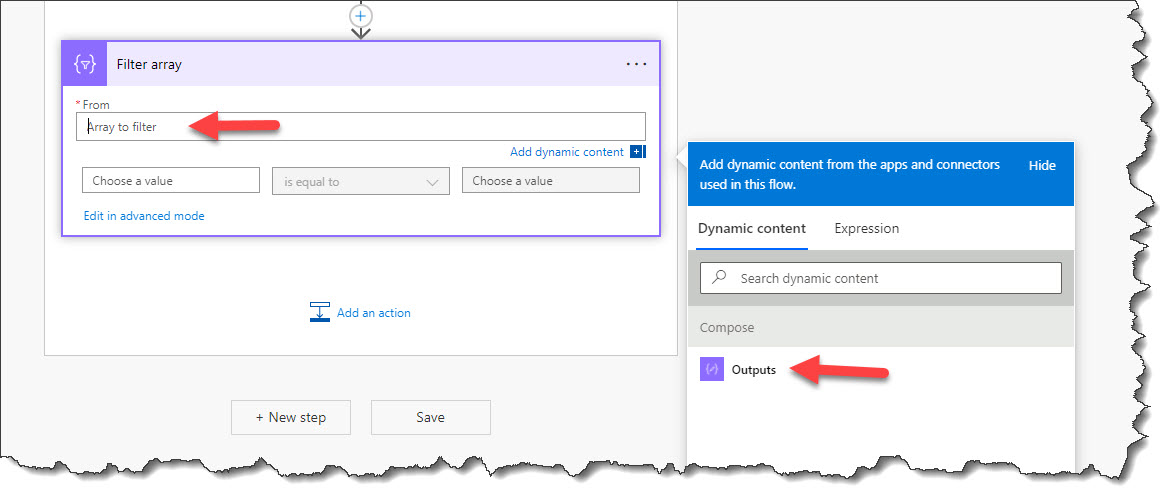
In the first “Choose a value” field, Paste in the following expression by clicking on the expression button. Please note that the expression builder window may look different to you:item()?['status']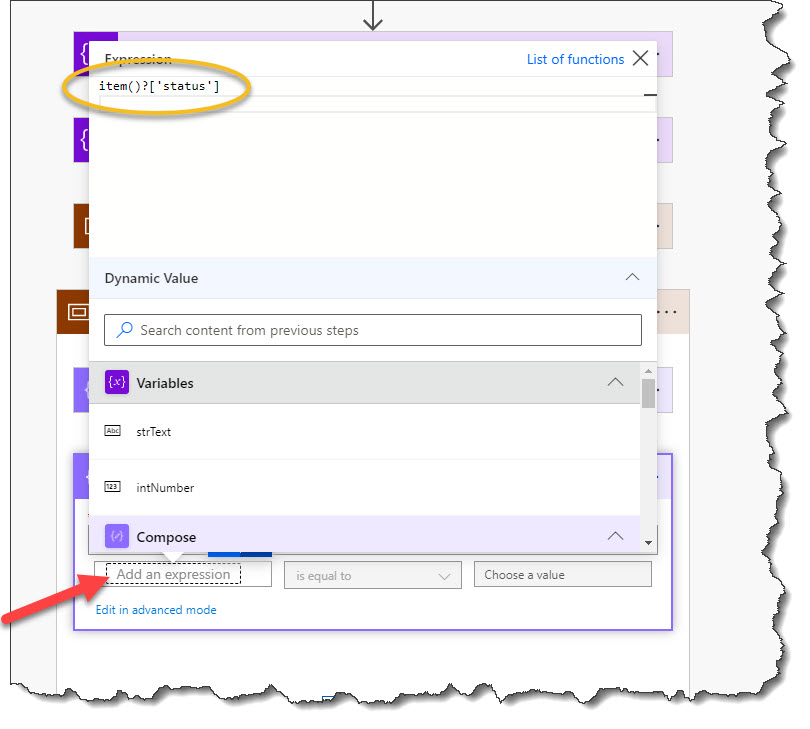
Keep it as “is equal to” and type in “Failed” in the right side “Choose a value” field. It is case sensitive:
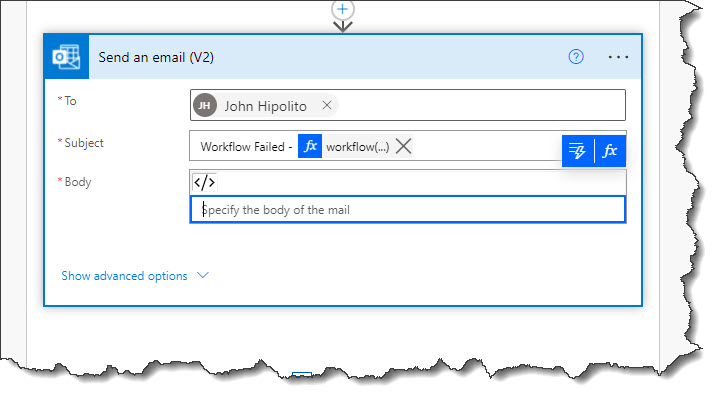
Click “Add an action” and select the “Send an email (V2)” action: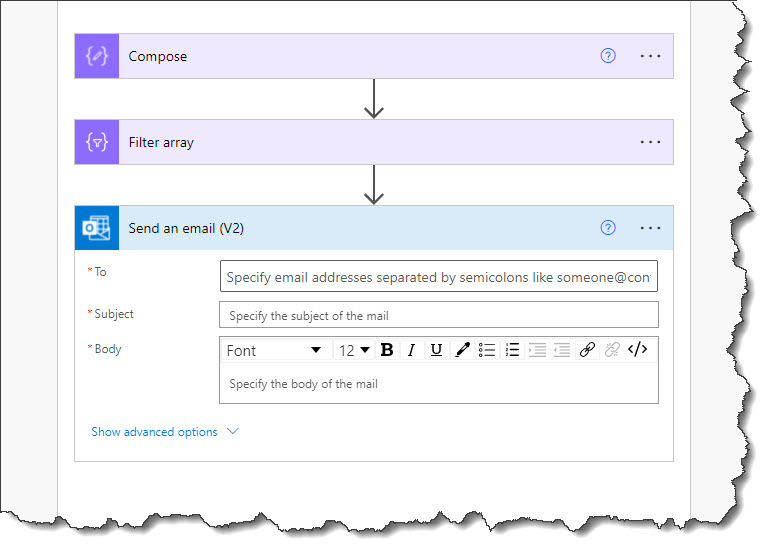
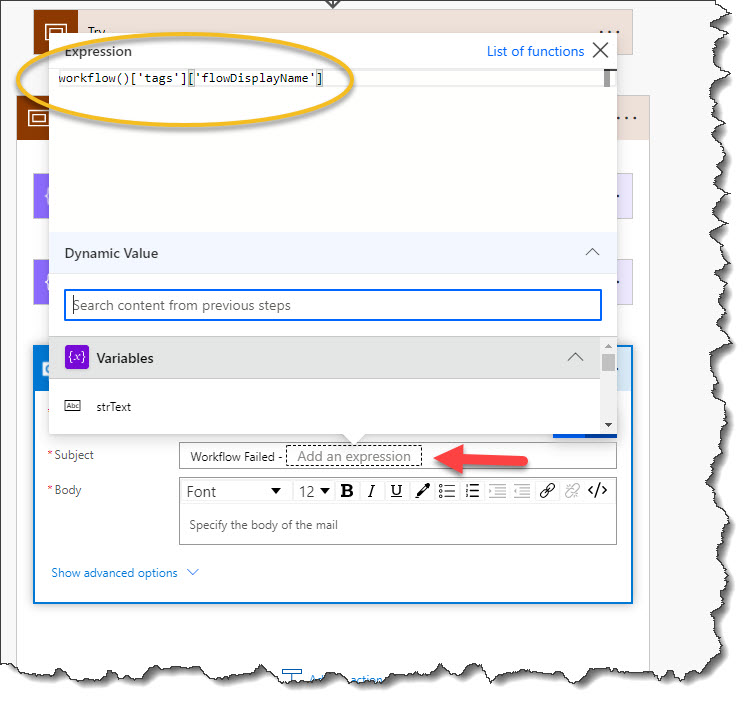
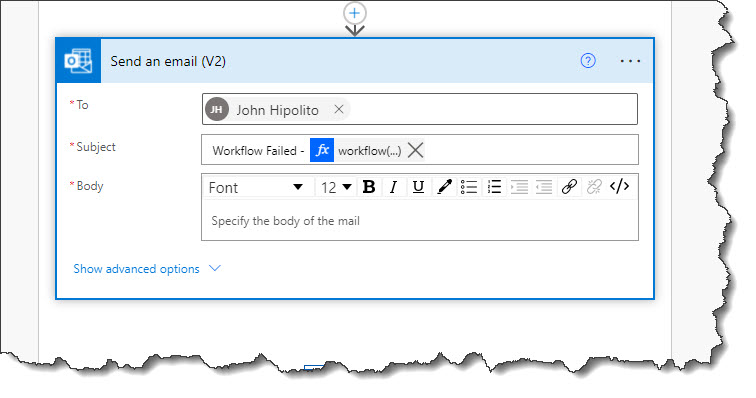
Select an email address for the “To” field in your organization where you want the error email to go. In the subject type in “Workflow Failed – “. Directly after the text in the subject, click on the expression button and paste in the following expression:workflow()['tags']['flowDisplayName']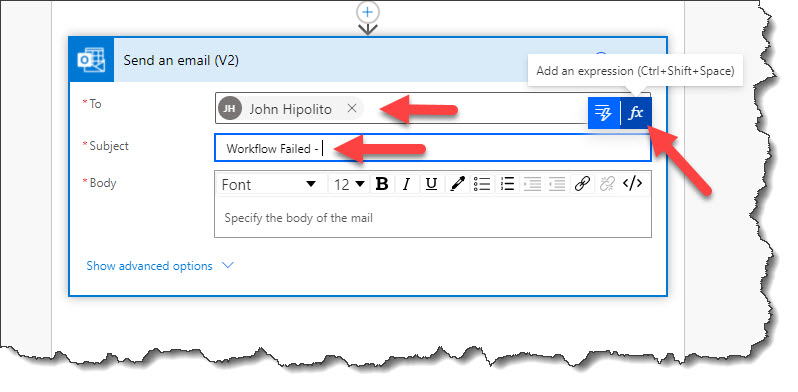
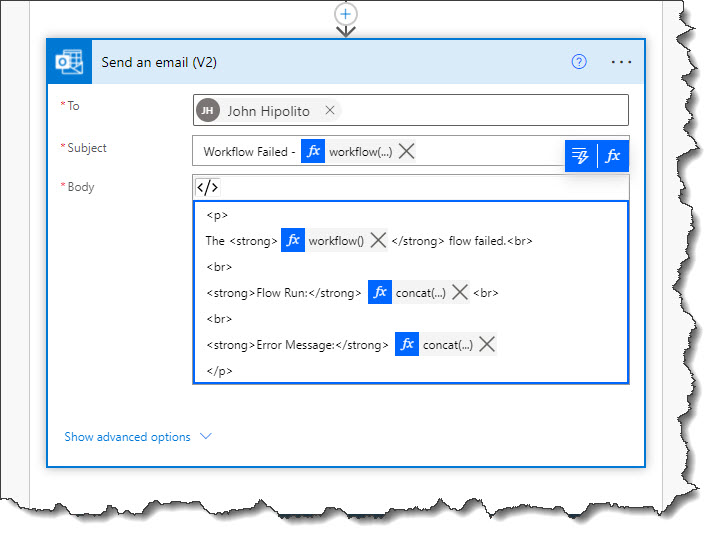
Click on the “Code view” button and clear the contents of the body. Paste the following code in the body of the email:
<p>
The <strong>@{workflow()['tags']['flowDisplayName']}</strong> flow failed.<br>
<br>
<strong>Flow Run:</strong> @{concat('https://us.flow.microsoft.com/manage/environments/', workflow()['tags']['environmentName'], '/flows/', workflow()['tags']['logicAppName'], '/runs/', workflow()['run']['name'])}<br>
<br>
<strong>Error Message:</strong> @{concat(body('Filter_array')[0]?['name'], ' - ', body('Filter_array')[0]?['error']?['message'])}
</p>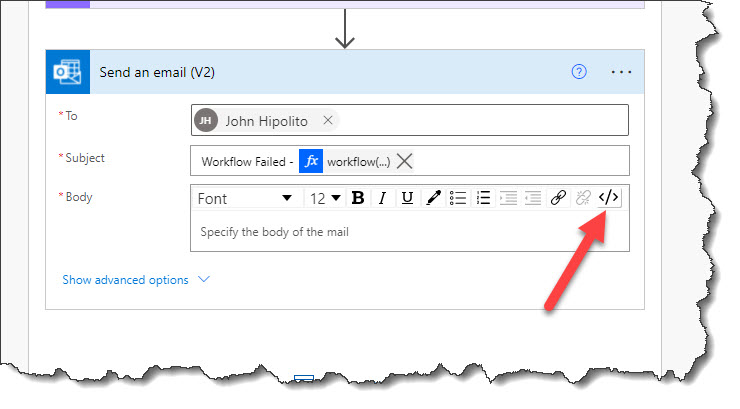
Click on the “+ New step” button after the “Catch” scope, search for the “Scope” action, and then click on it to add it. Rename the new scope action to “Finally”: 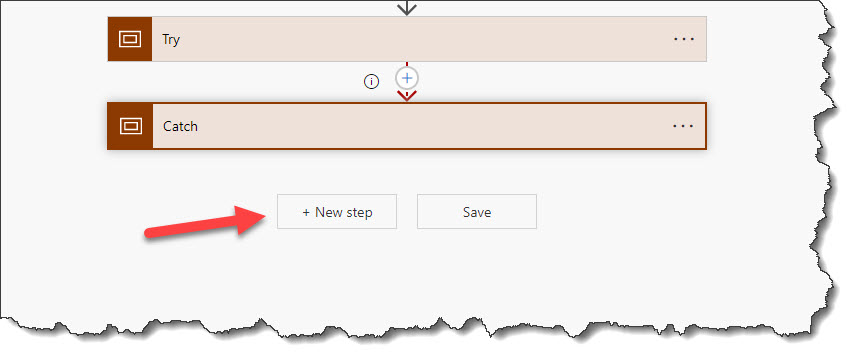
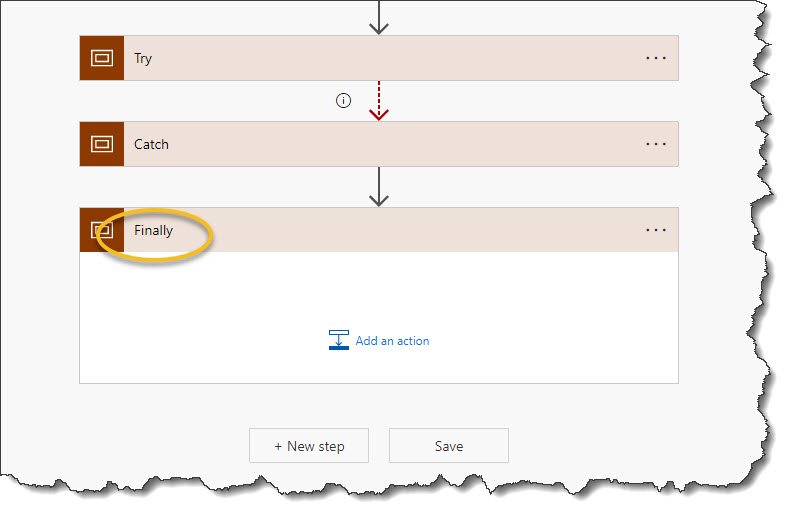
Select “Configure run after” by first clicking on the menu for the “Finally” scope: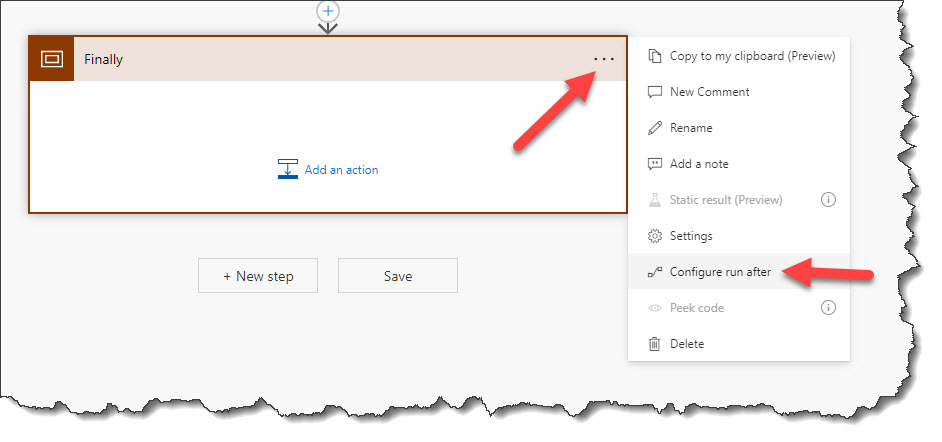
Select all of the options, then click on the “Done” button. The “Finally” scope will run regardless of any failures or time-outs. This is so you can do other actions based on if it is a failure or not: 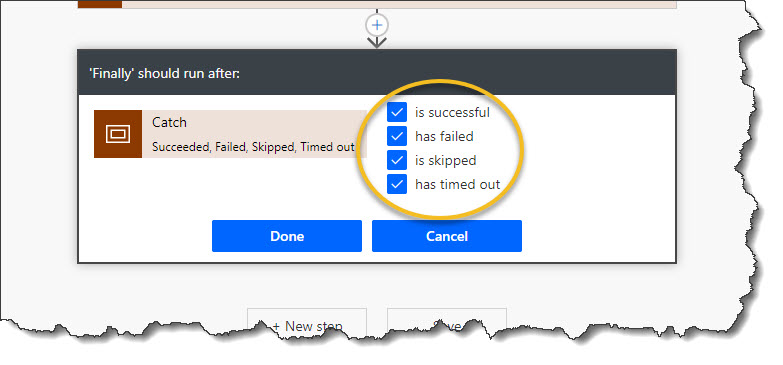
In the “Finally” scope you can add any other actions you feel necessary. I like to set another variable in the “Catch” scope that the flow failed. I can then use the variable to terminate the flow as failed or successful. Be creative here.
After testing the flow, you will get an email giving you useful information on why the flow failed and a link to the flow run for further analyses:
Happy SharePointing!