

In this three part series, I’m going to walk through the whole process of creating groups, custom permission levels, and adding permissions to a group.
Using Power Automates powerful “Send an HTTP request to SharePoint” action, is incredibly powerful and allows us to do countless tasks. Using the SharePoint Rest API gives us so much flexibility. One of your requirements might be to set up site security and this is where this action comes in handy.
 | Time to read: About 15 minutes |
 | Intended for: SharePoint developers who use Power Automate |
 | Key takeaway: In this tutorial I will demonstrate how to create a permission group in Power Automate. |
For this tutorial, we will be using Office 365 SharePoint Online and Power Automate.
**Click on any of the images to see a larger view**
Step 1 – Create a new flow
In Power Automate, select “My Flows”, click on the “New” drop down, and then click on “Instant-from blank”: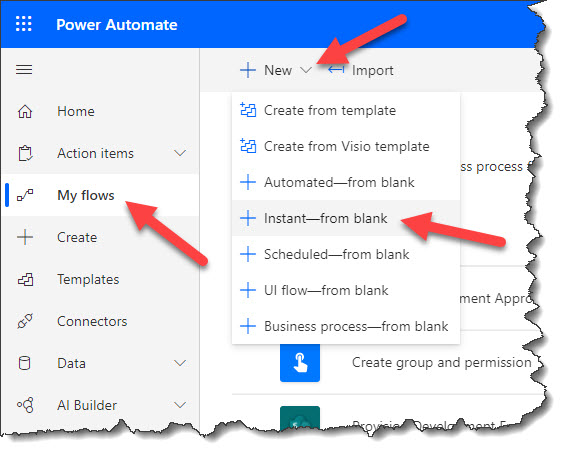
Name the flow “Site Permissions”, select “Manually trigger a flow”, and then click on the “Create” button: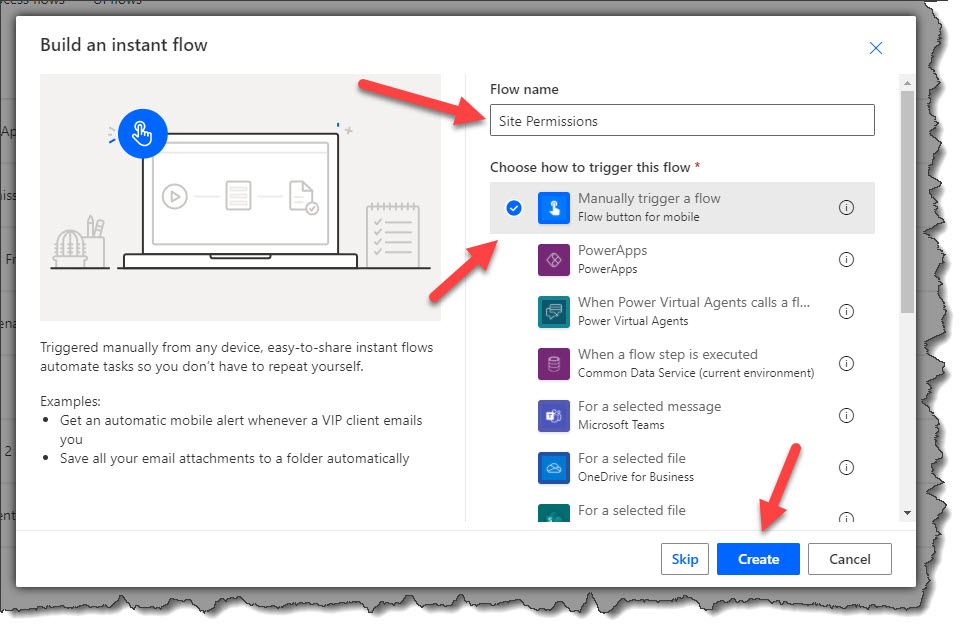
Step 2 – Add actions
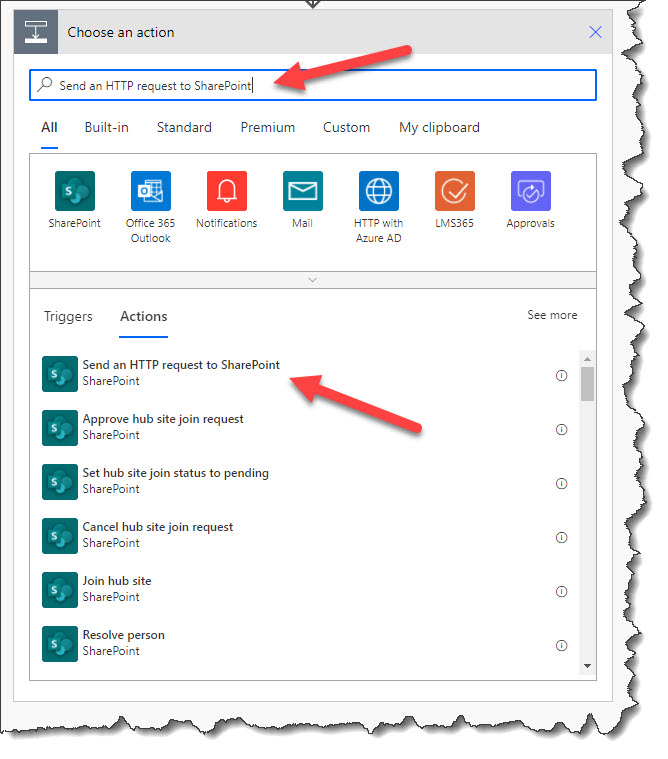
Click on the “+ New step” button and search for the “Send an HTTP request to SharePoint” and click on it: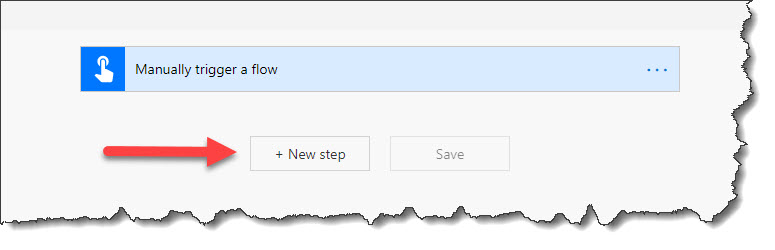
You will now see the “Send an HTTP request to SharePoint” action: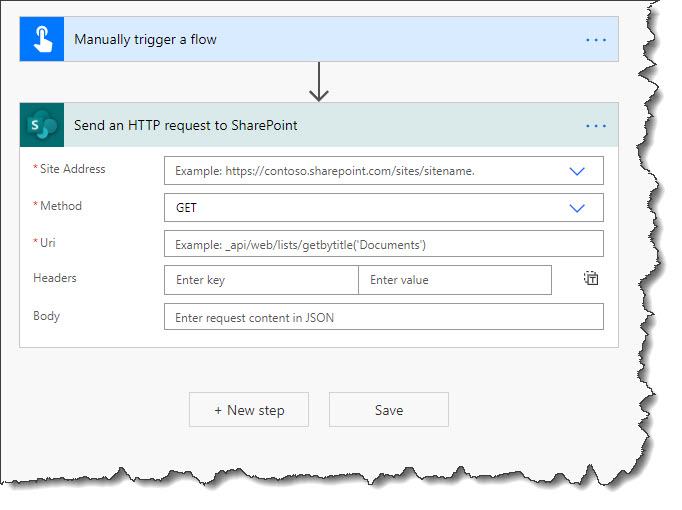
Lets rename our action to something more readable. Click on the three ellipses and then click on Rename: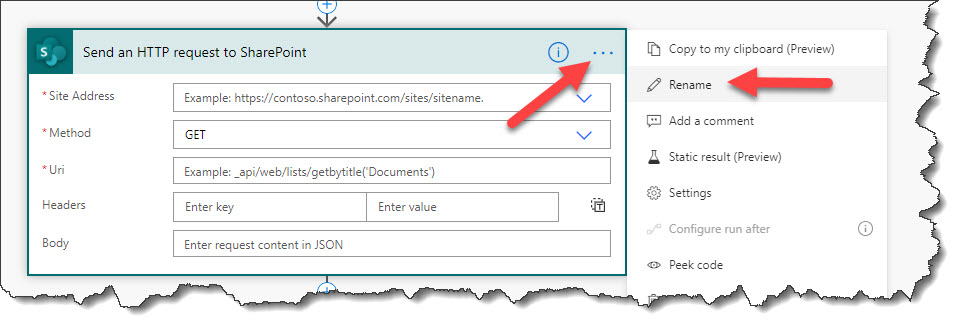
Rename the action to “Create Test Group”: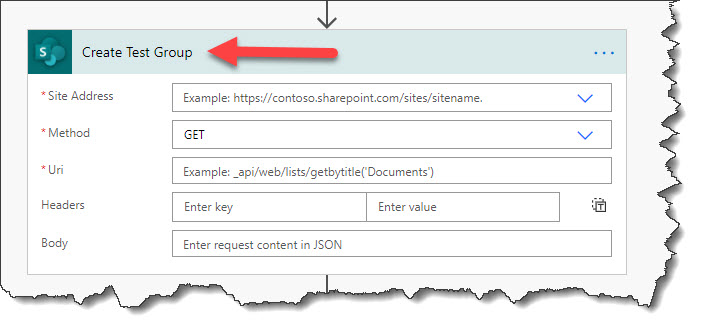
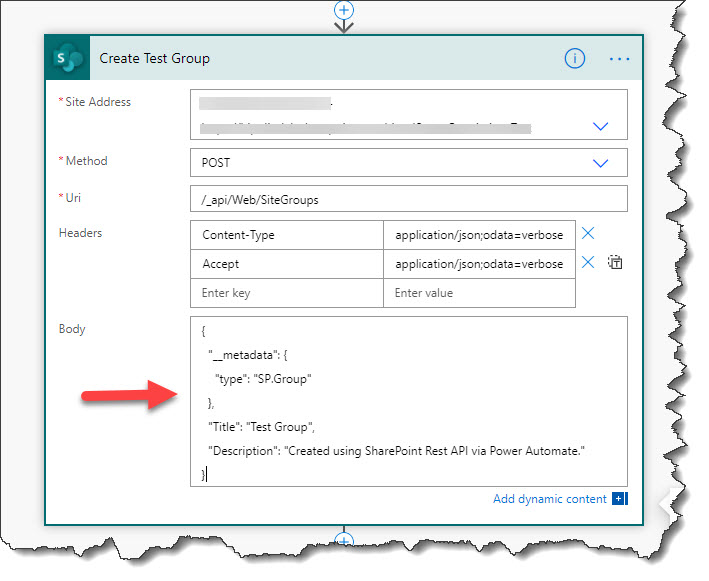
Select the Site Address: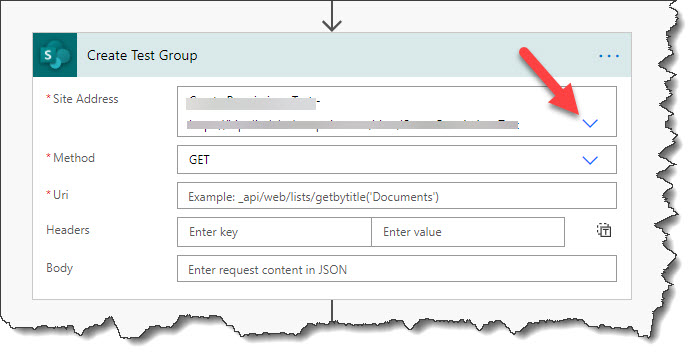
For the method, select “POST”: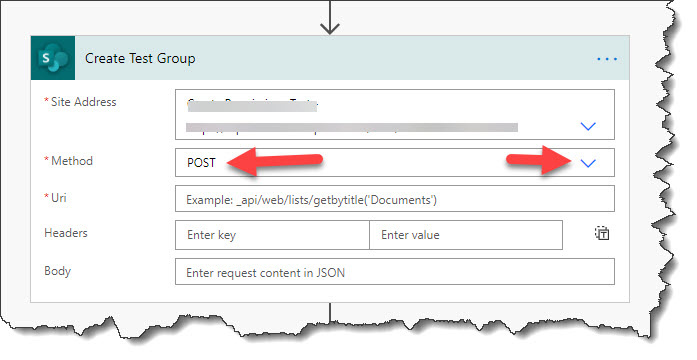
Paste the following in the “Uri” field:/_api/Web/SiteGroups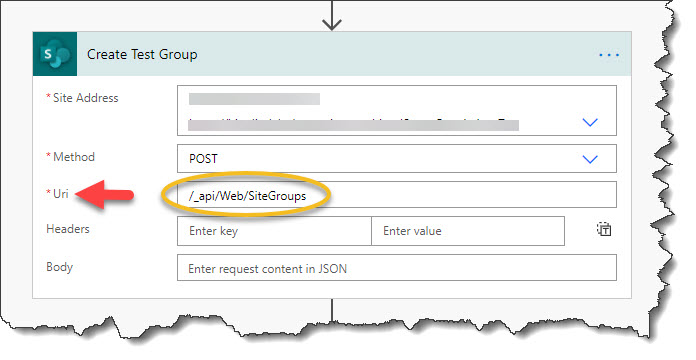
For the “Headers”, click on the “Switch to text mode” button: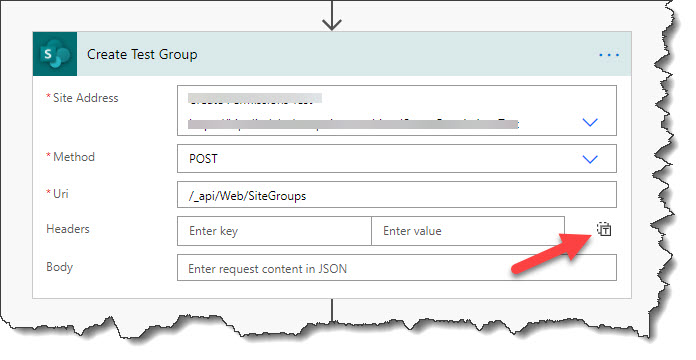
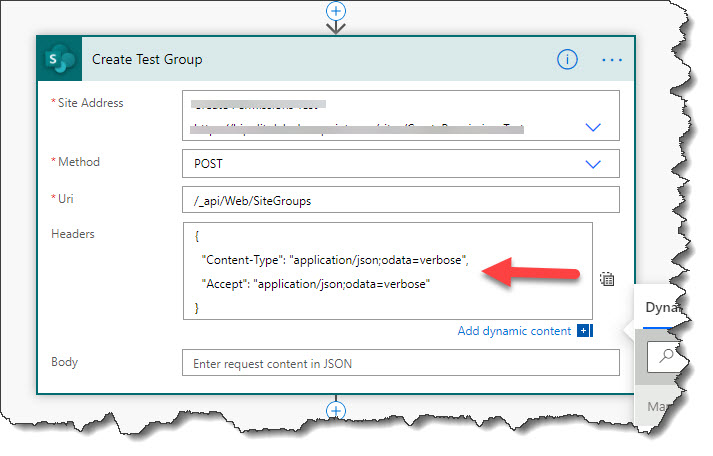
Paste in the following JSON in the “Headers” field:
{
  "Content-Type": "application/json;odata=verbose",
  "Accept": "application/json;odata=verbose"
}
Click on the “Switch to key value mode” button: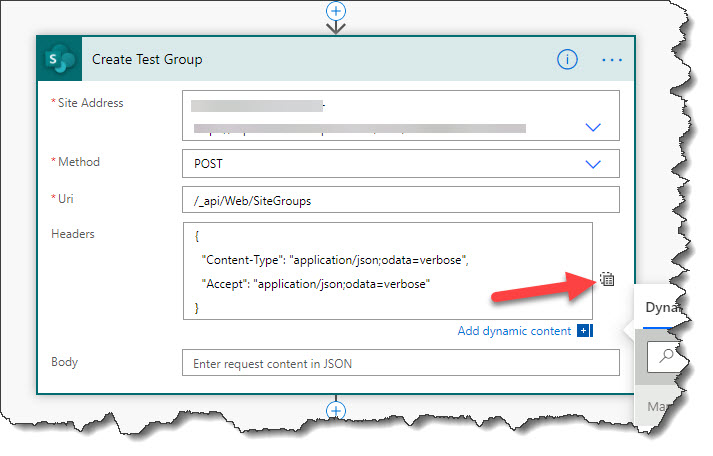
In the “Body” field paste in the following JSON:
{
  "__metadata": {
    "type": "SP.Group"
  },
  "Title": "Test Group",
  "Description": "Created using SharePoint Rest API via Power Automate."
} 
Step 2 – Test
Navigate to the groups page in your SharePoint Site https://YourTenant.sharepoint.com/sites/YourSite/_layouts/15/groups.aspx and take note of the current groups: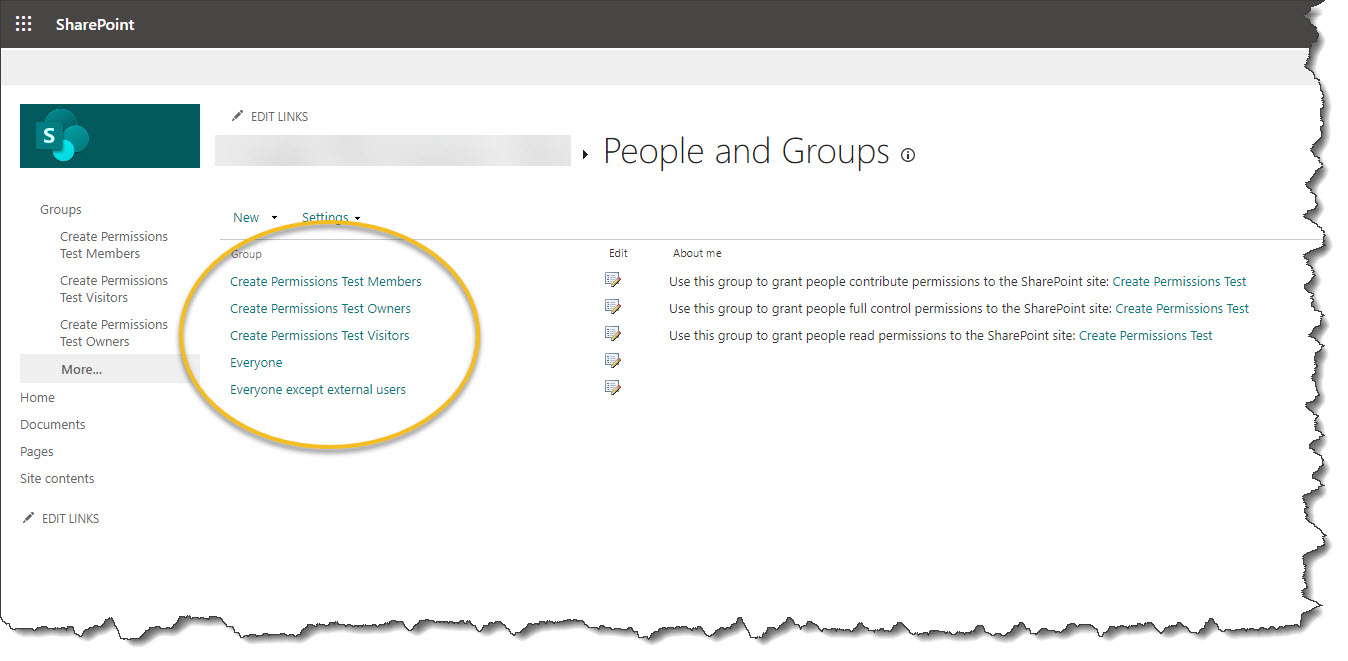
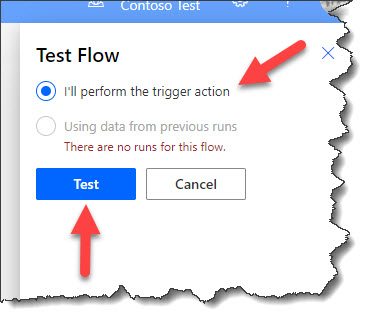
Run your flow by clicking on the “Test” button in the upper right corner, then click on “I’ll perform the trigger action” and then click on the “Test” button: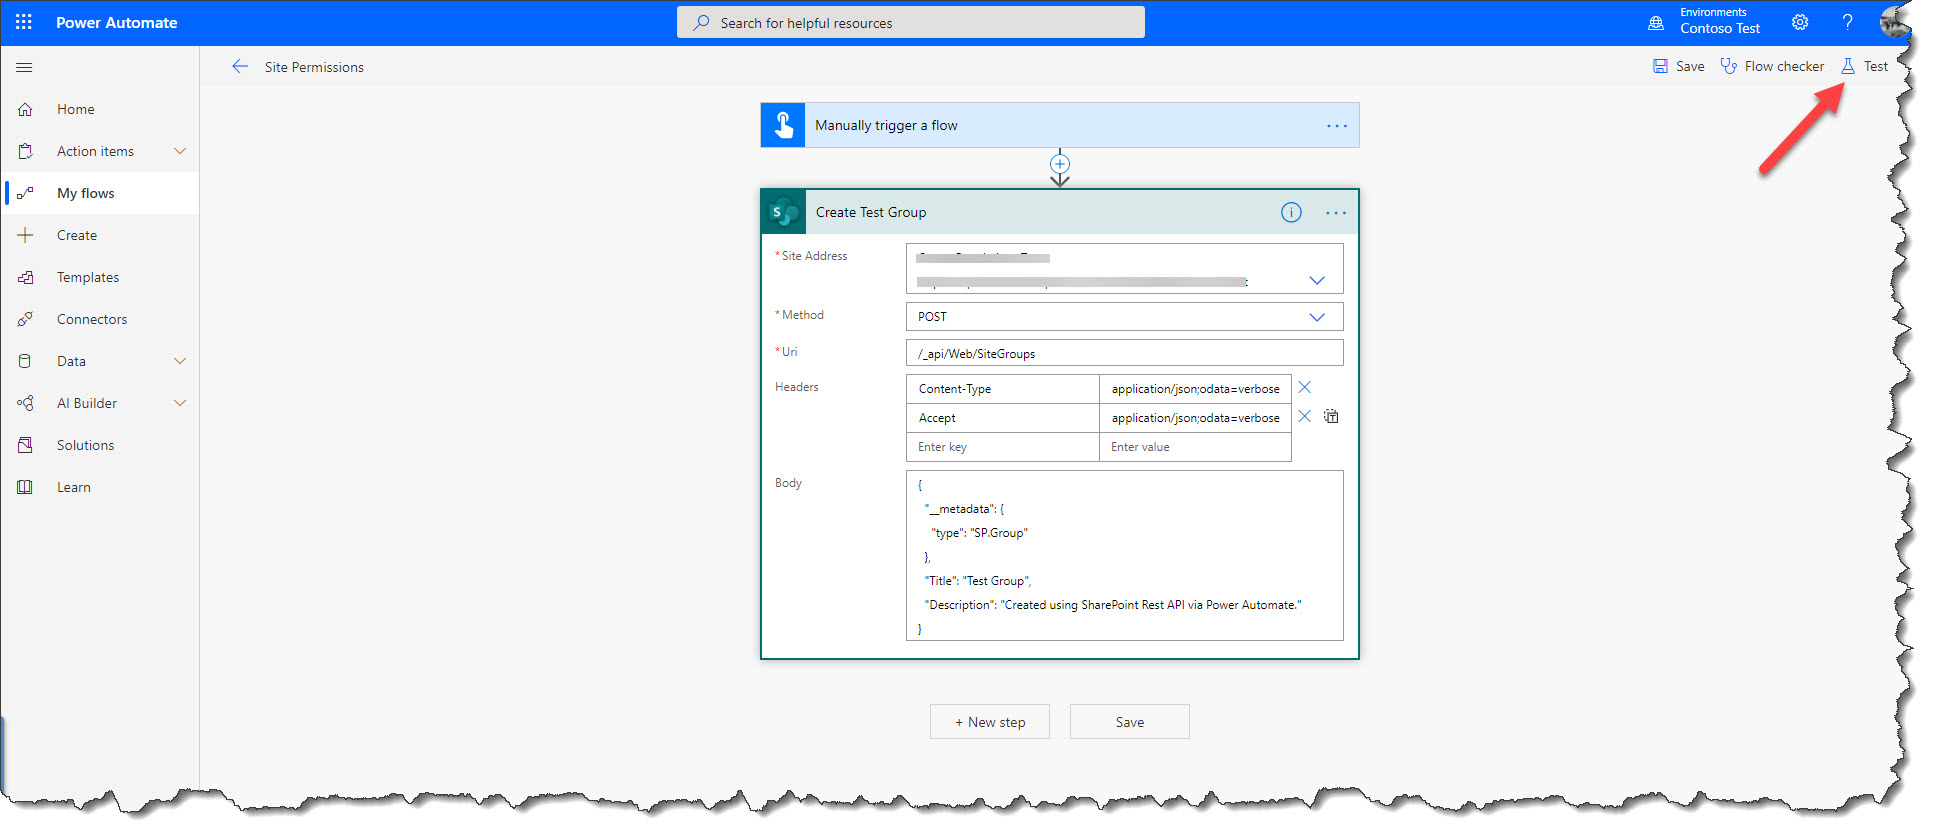
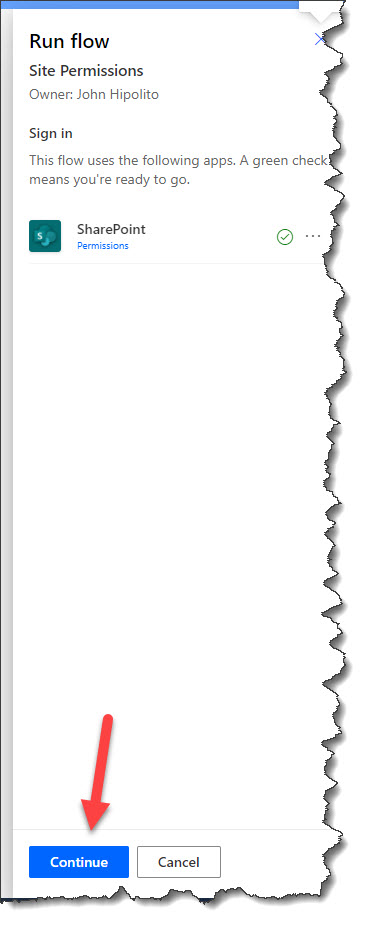
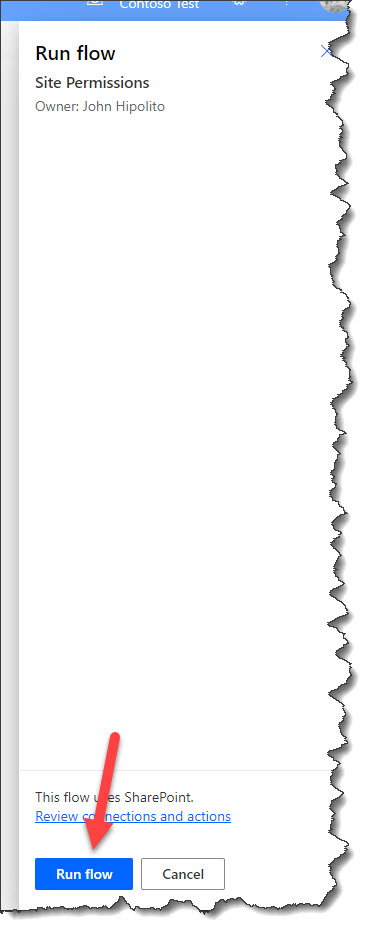
If you see the “Sign in” panel, click on the “Continue” button, and then click on the “Run Flow” button:
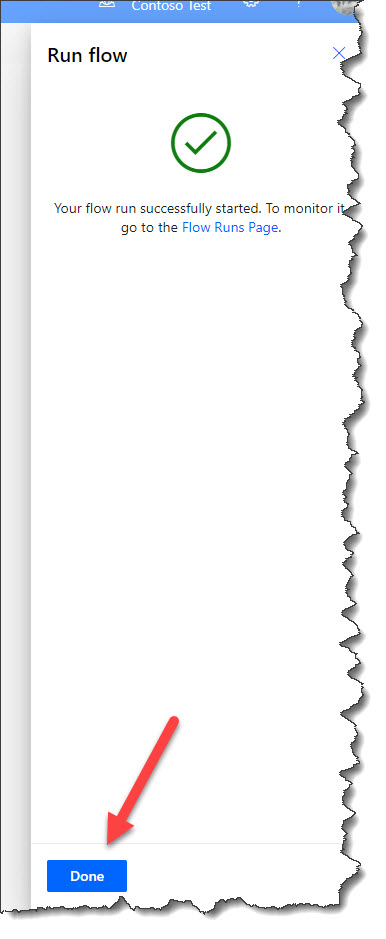
You should now see the “Started” panel. Click on the “Done” button:
Your flow will either be running still or it has completed already. There should be an indicator specifying the outcome: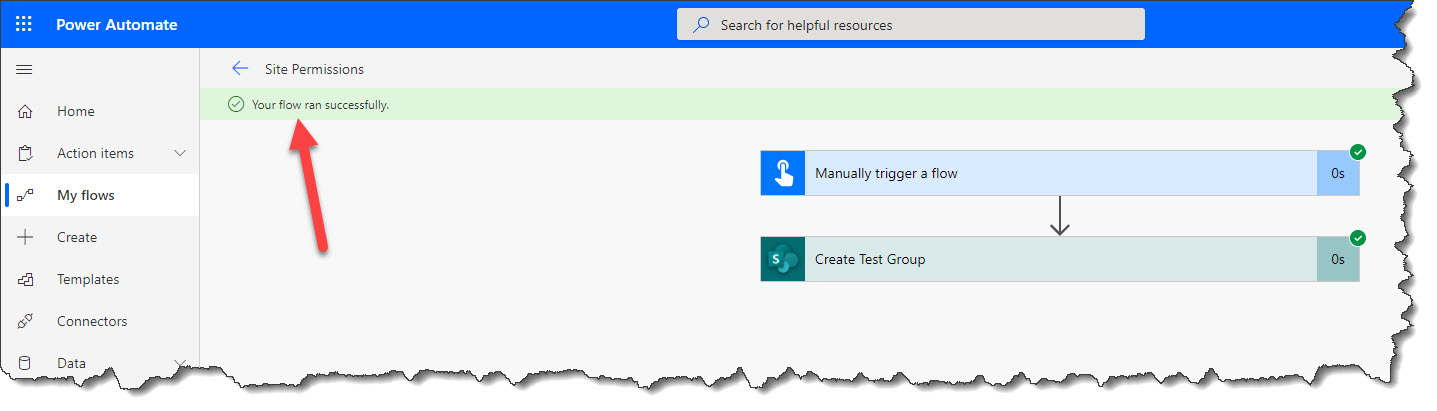
If you see that your flow ran successfully, navigate to your groups page (https://YourTenant.sharepoint.com/sites/YourSite/_layouts/15/groups.aspx) in your SharePoint site or refresh the page if you are still on it. You should now see your new group created: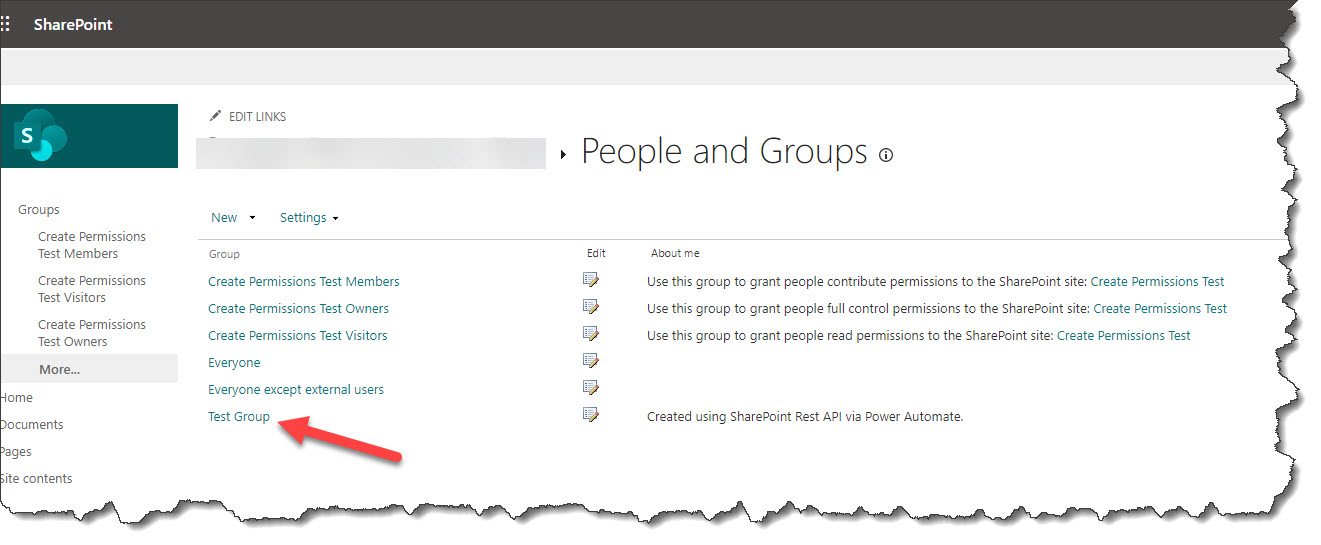
In Part Two, we will dive deeper into this flow, so save it and hang on to it for my future tutorials. I will show you how to create a new permission level while using a tool I created to aid in choosing your permissions since the process of choosing which permissions to use can be highly complex. In Part Three, we will put it all together.
Happy SharePointing!