

In Part One – Creating Groups, We first started by creating a group called “Test Group”. In this tutorial, we will walk through creating a custom permission level that we can add to our new group in the future tutorial Part Three.
 | Time to read: About 30 minutes |
 | Intended for: SharePoint developers who use Power Automate |
 | Key takeaway: In this tutorial I will demonstrate how to create a custom permission level using Power Automate. |
For this tutorial, we will be using Office 365 SharePoint Online, Power Automate, and the Permission Creator Tool I created, to make creating permission levels much easier.
Step 1 – Add actions to our Site Permissions flow from Part One:
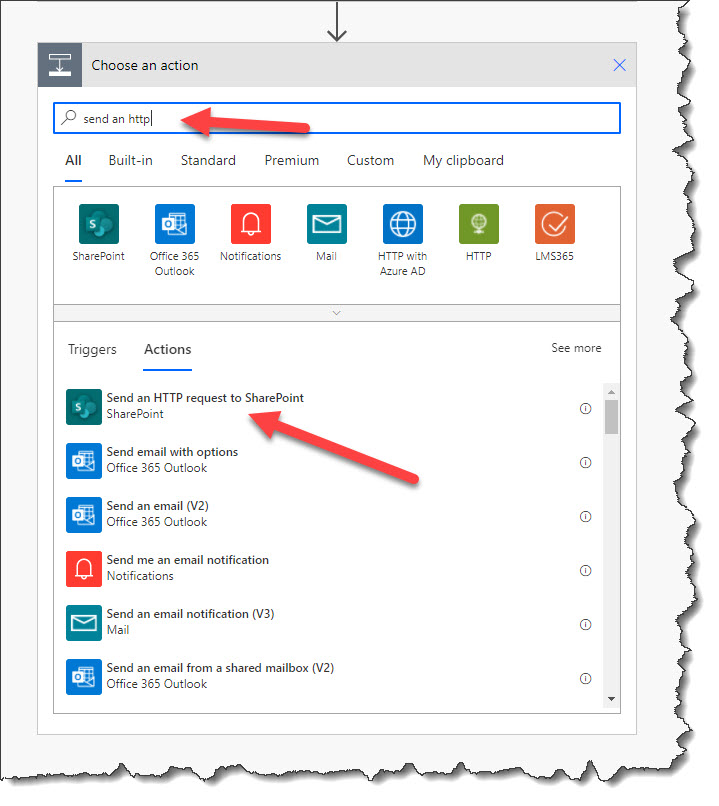
Click on the “+New step” button and search for “Send an HTTP request to SharePoint”: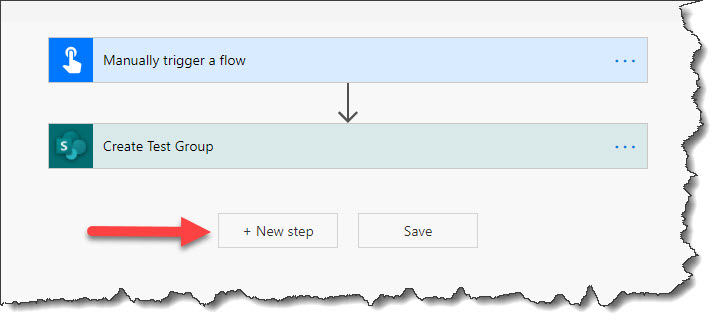
Rename the action to “Create new permission level” and then select the site we chose in Part One: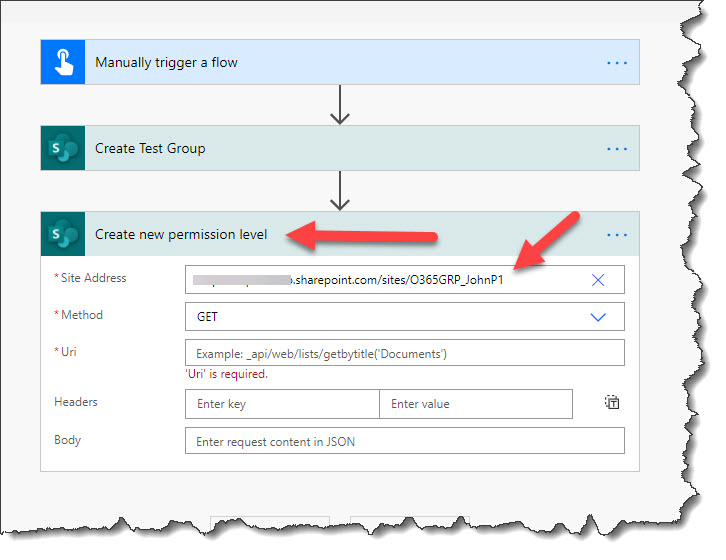
Select “Post” for the method, then paste the following Uri for the Uri field:
/_api/web/roledefinitions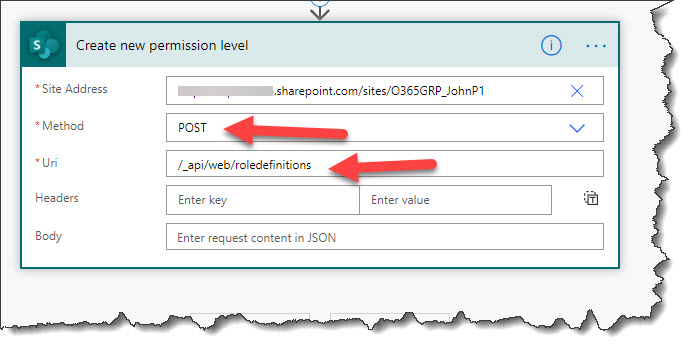
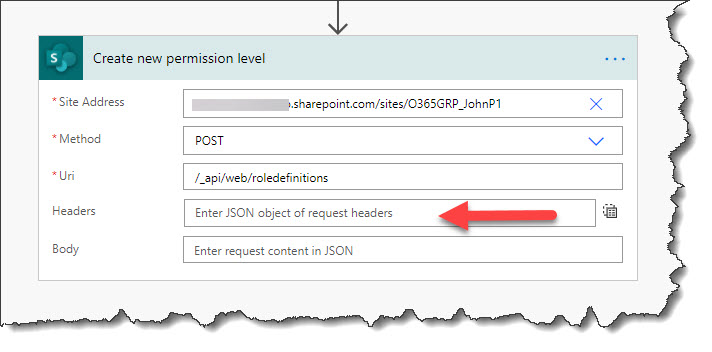
Click on the “Switch to text mode button”: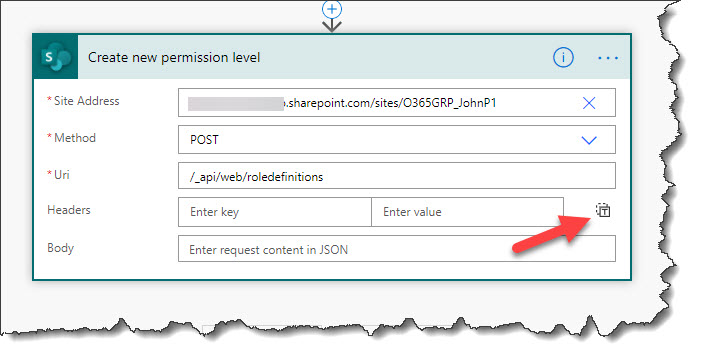
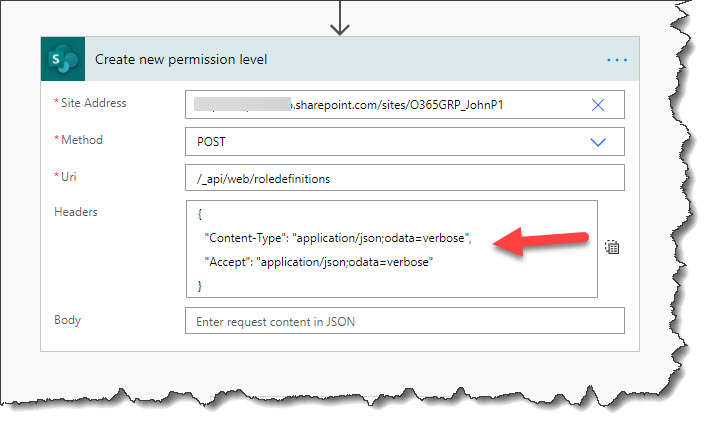
Paste in the following JSON in the “Headers” field:
{
  "Content-Type": "application/json;odata=verbose",
  "Accept": "application/json;odata=verbose"
} 
Click on the “Switch to key value mode” button: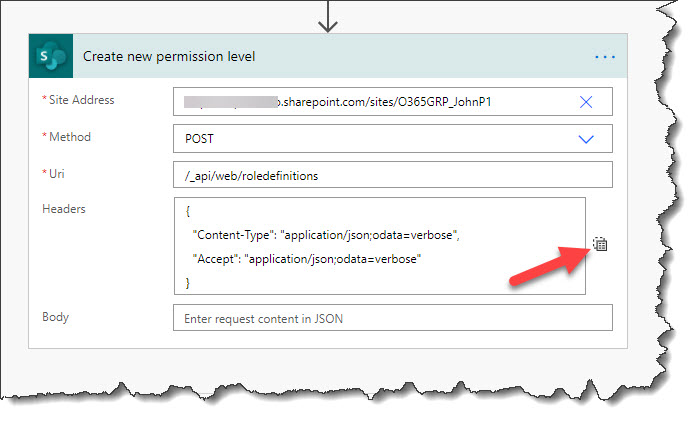
Step 2 – Create a permission level from the attached Excel spreadsheet
Download the following excel spreadsheet:
Open the spreadsheet and select the “Permission List” sheet at the bottom:
In column “E”, select “Yes” if you are allowing or “No” to deny each permission: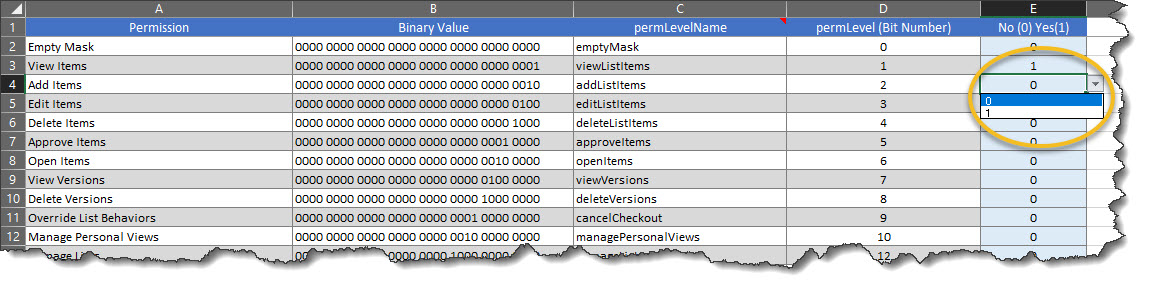
Lets set up a permission level identical to “Contribute” but not allow the deletion of list items or documents. If you’d like, you can have a look at the “Contribute” permission level in SharePoint as a reference by going to https://YourTenant.sharepoint.com/sites/YourSite/_layouts/15/role.aspx and then clicking on “Contribute”: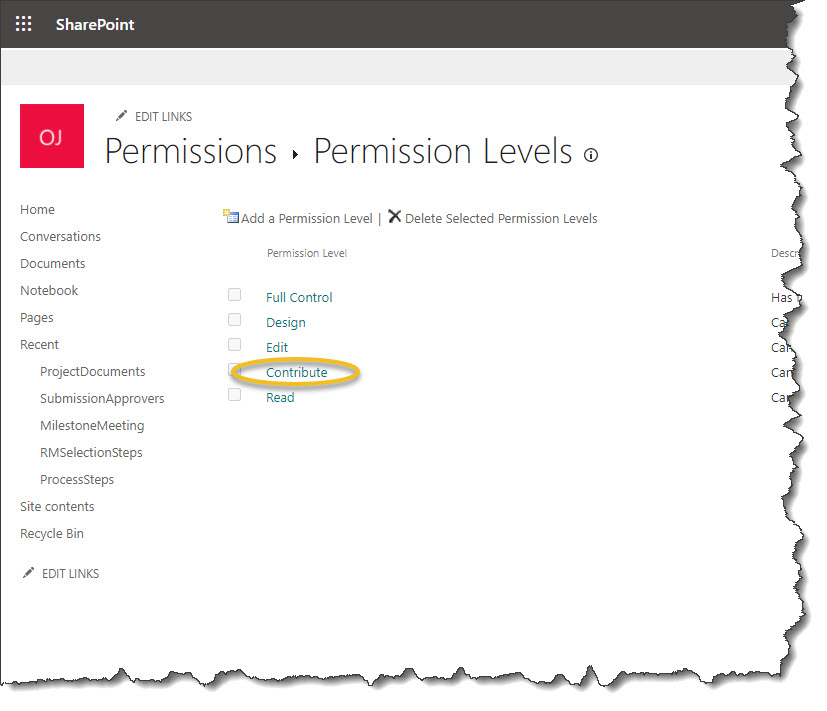
We should now have something similar to this. Notice that I did not select “Delete Items”. This is the only different from the “Contribute” permission level: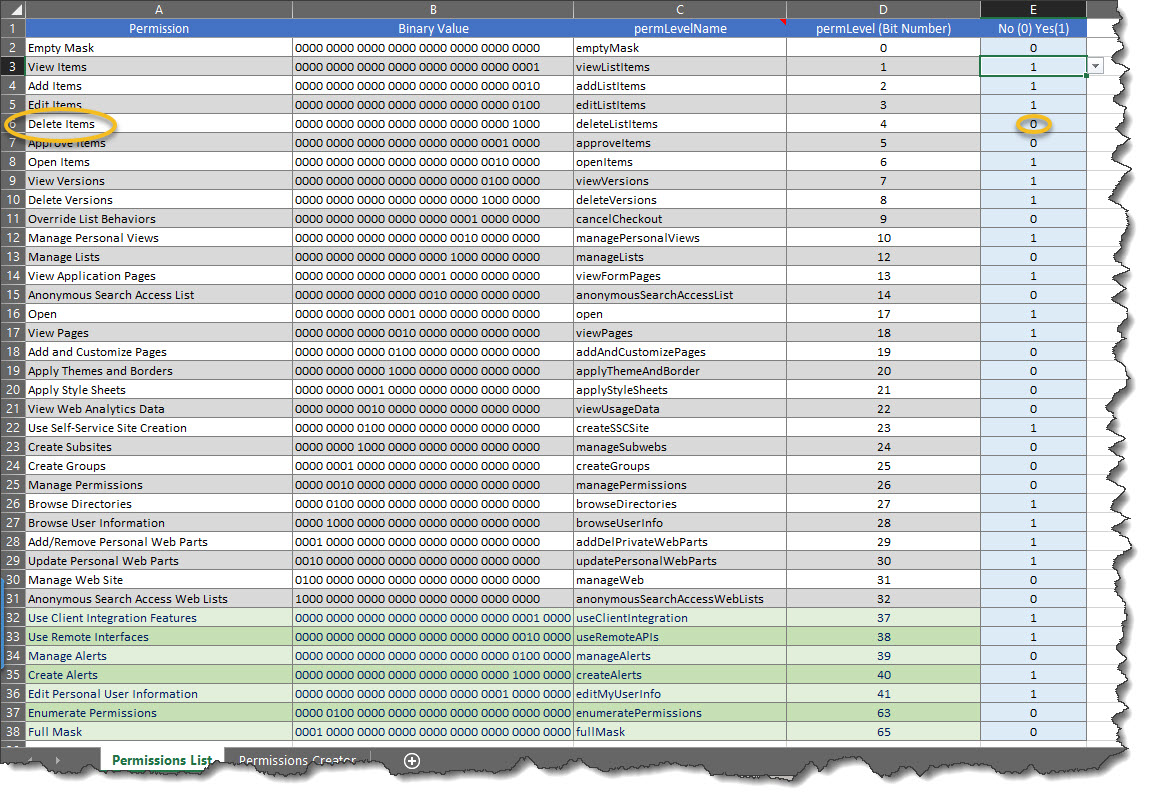
Click on the “Permissions Creator” sheet at the bottom: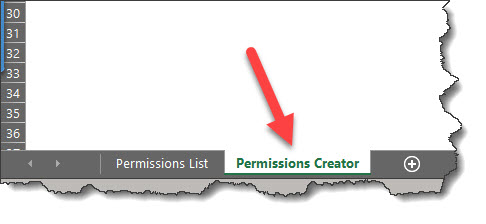
Go back to your flow and in the “Body” field, paste the following JSON:
{
  "__metadata": {
    "type": "SP.RoleDefinition"
  },
  "BasePermissions": {
    "__metadata": {
      "type": "SP.BasePermissions"
    },
    "High": "",
    "Low": ""
  },
  "Description": "Same as Contribute but deleting is not allowed in lists and document libraries.",
  "Name": "Contribute-Delete",
  "Order": 180
}
Notice that our “High” and “Low” value are empty quotes: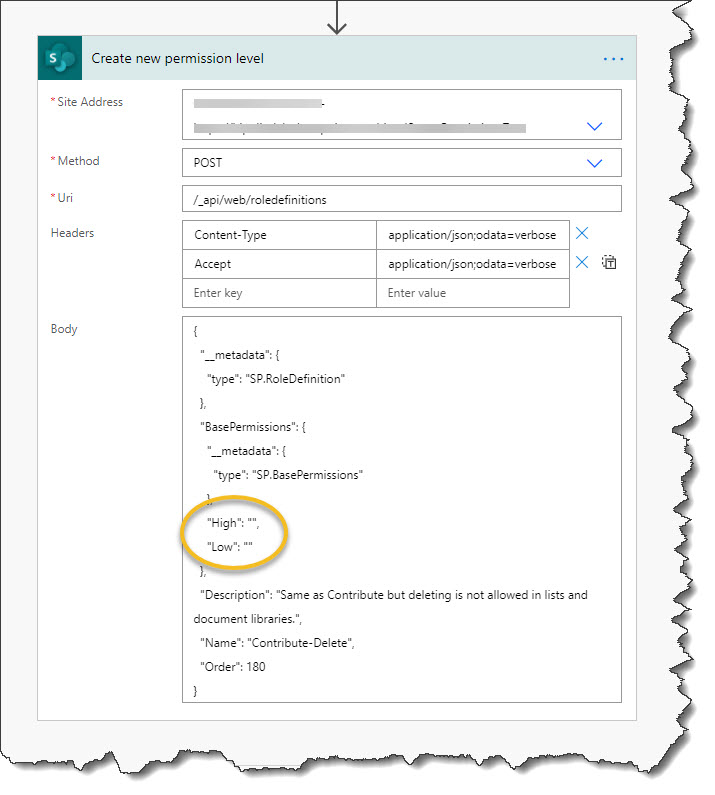
Switch back to the spreadsheet and the “Low Result Decimal Value” field and the “High Result Decimal Value” field on the “Permissions Creator” sheet shows the values we need: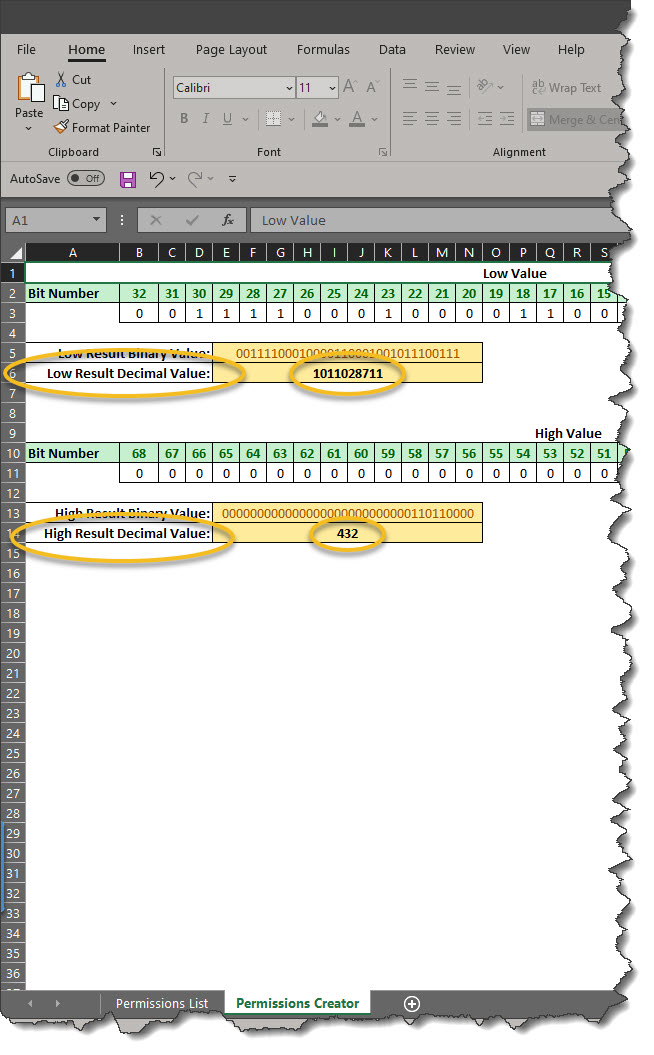
Type in the values between the double quotes for the Low and High values in your flow. Make sure you are placing the correct values between the quotes: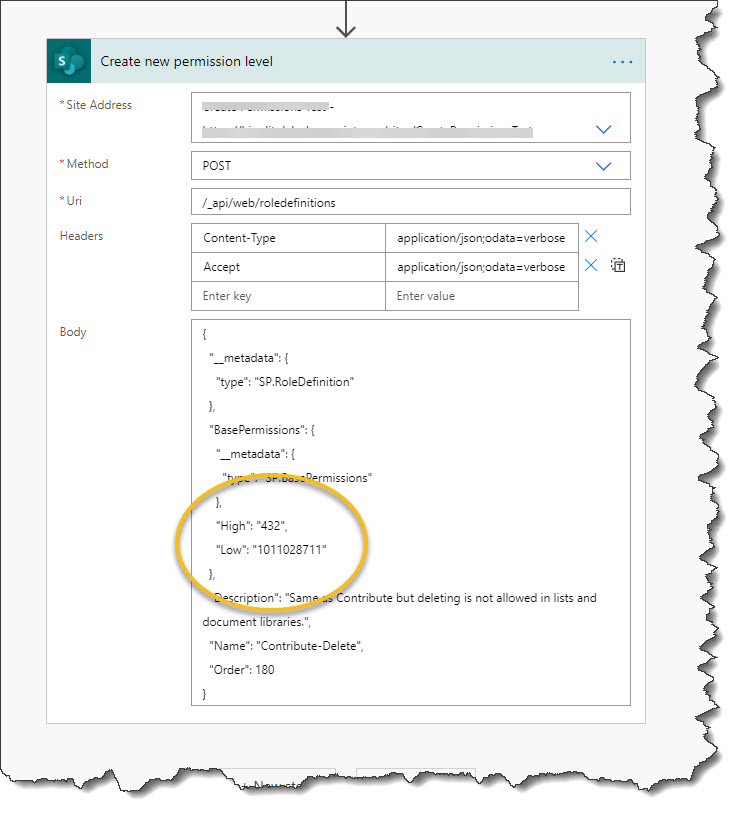
We now have all of our actions completed and we are ready to test.
Step 3 – Test
Go to the groups page in your SharePoint site (https://YourTenant.sharepoint.com/sites/YourSite/_layouts/15/groups.aspx) to remove the “Test Group” group that we created in Part One, so that we do not get any errors in our flow. This will happen if it tries to create a group that already exists. If it exists, click on the “Edit” button:
Click on the “Delete” button at the bottom right corner of the page: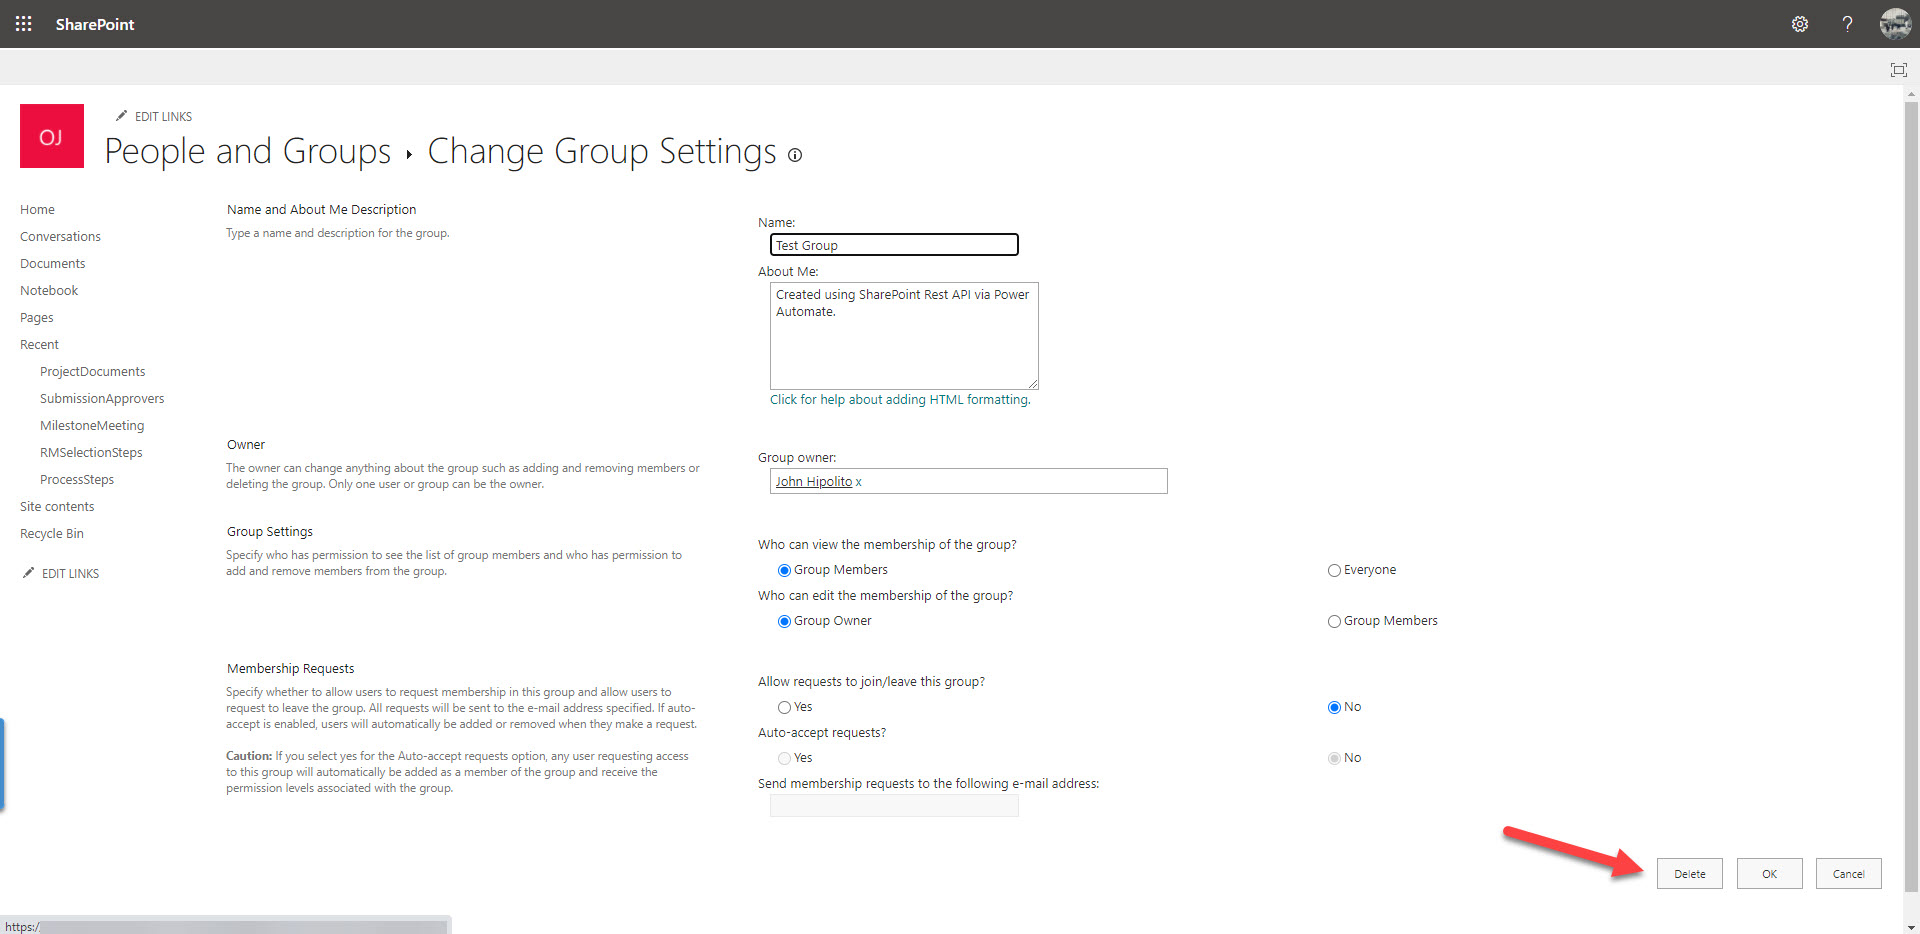
Go to the page that shows all permission levels in SharePoint (https://YourTenant.sharepoint.com/sites/YourSite/_layouts/15/role.aspx) to see that the Contribute-Delete permission level does not yet exist: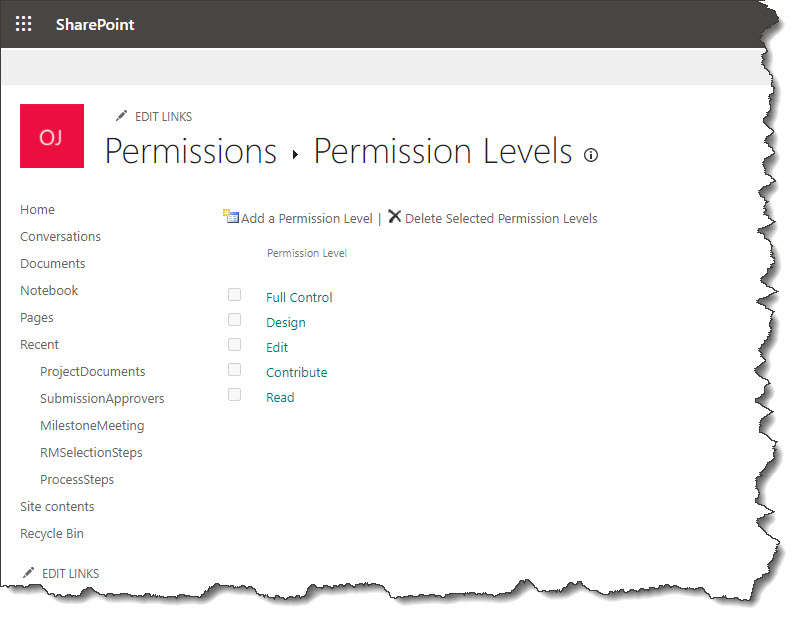
In your flow, Click on the “Test” button in the upper right corner of the page:
Select “I’ll perform the trigger action” and then click on the “Save & Test” button: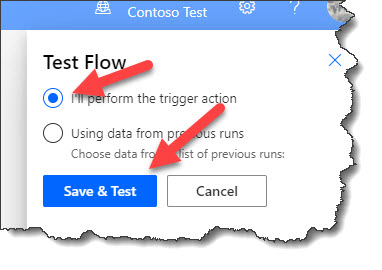
Click on the “Run flow” button: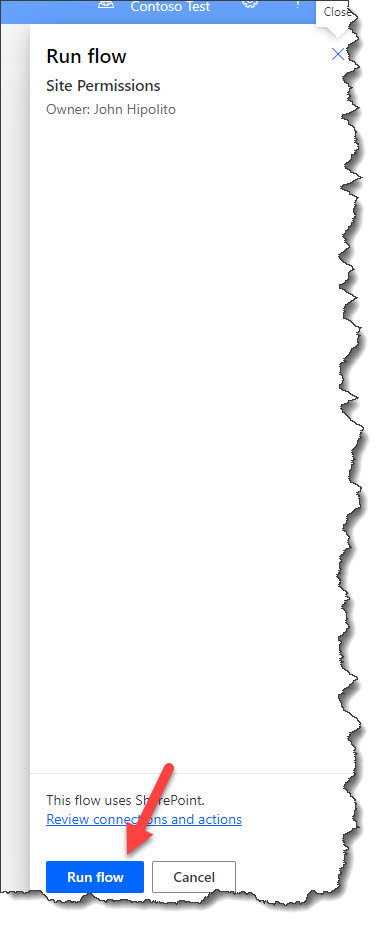
Click on “Done”:
You should see that your flow ran successfully: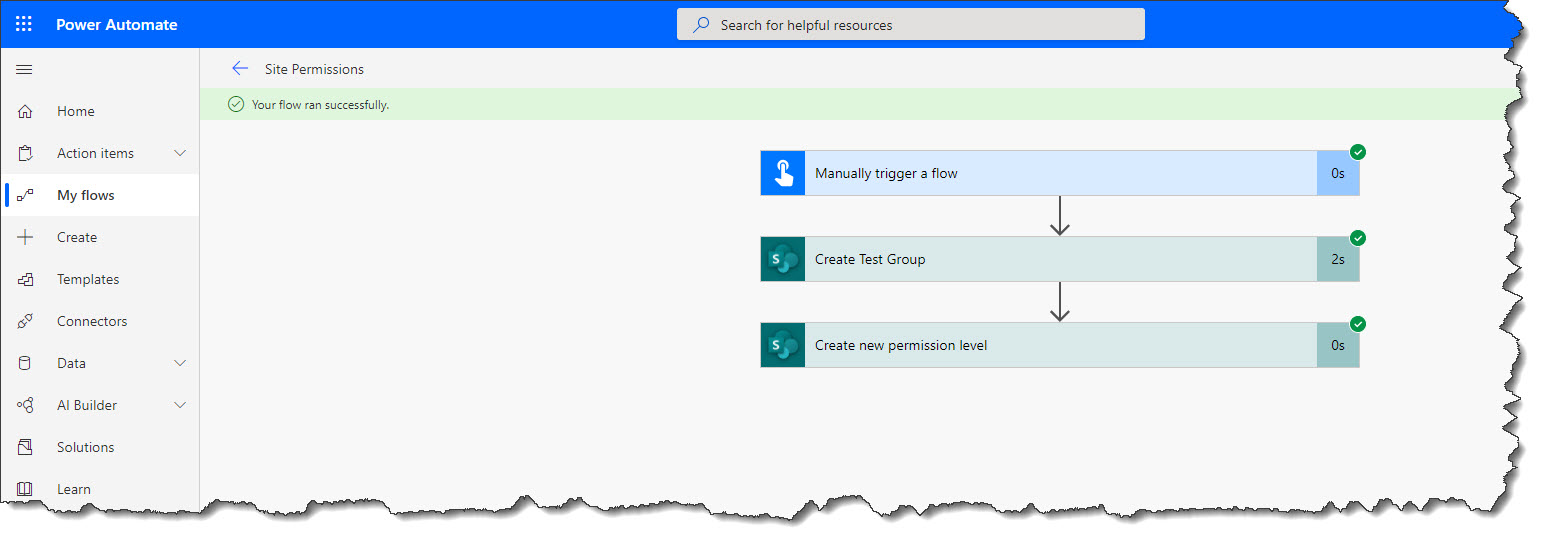
Go to the groups page (https://YourTenant.sharepoint.com/sites/YourSite/_layouts/15/groups.aspx) and then to the permissions page (https://YourTenant.sharepoint.com/sites/YourSite/_layouts/15/role.aspx) to see if they both exist: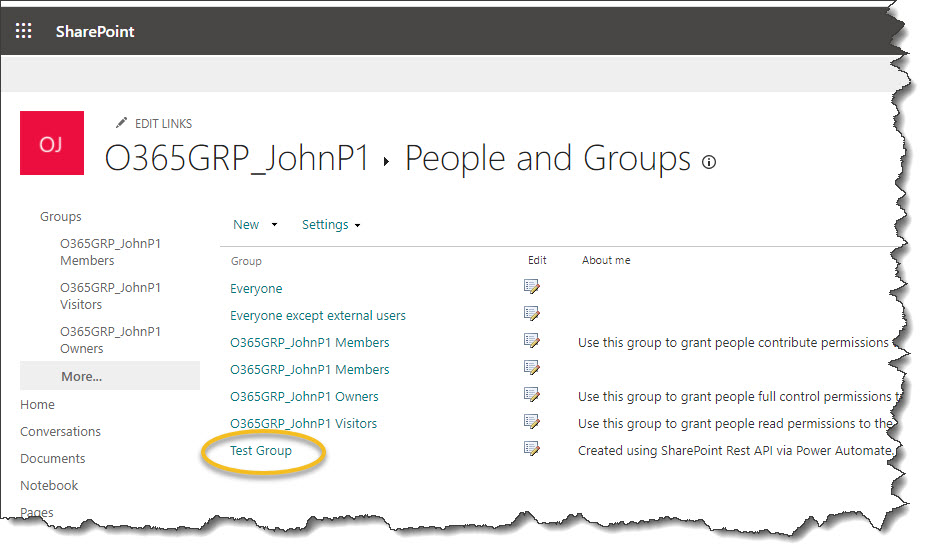

Click on “Contribute-Delete” so that we can check to make sure the selected permissions match what you selected in the spreadsheet: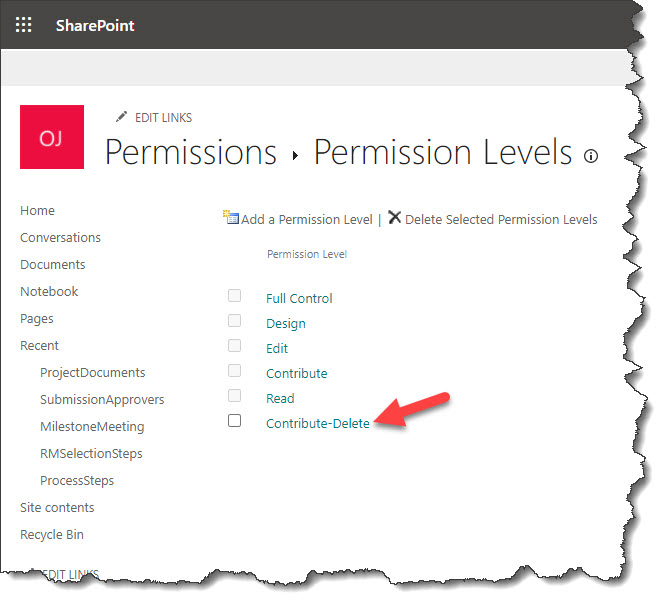
If you selected the same thing as I did, you will notice that the “Delete Items” permission is unchecked:
In Part Three, we will dive even deeper into this flow, so save it and hang on to it for my last tutorial, Custom Site Permissions in SharePoint Using Power Automate Demystified – Part Three – Adding a Custom Permission Level to a group. I will show you how to add the new permission level to the new group we created.
Happy SharePointing!
OH MY GOSH. This is incredible. Its crazy there is that much to creating a custom permission level. I am making a flow to automate new site creation and this saved me!
Good morning Zach, I was right there with you! This is the result of hours of research I had to do to meet requirements for a client. Take care.
This is excellent. Thanks. Would you have the logic for updating the Description field of a permission level? Specifically, I want to update the Description for the Edit permission level. Thanks!