
Microsoft has been fast and furious with many recent updates in capabilities to Microsoft Flow. Shared mailboxes, Azure AD connector, parallel branching, and support for a slew of new services. Recently I was involved in an internal project where we leveraged one of the ever-growing number of Connectors in Microsoft Flow.
Last month we participated in a webinar, leading a discussion and demonstration highlighting some marketing scenarios for the Sitecore platform. There are several approaches to the registration/confirmation/lead creation process, each with their own benefits and drawbacks. The webinar was hosted on GoToWebinar and we wanted to generate Leads in our Dynamics 365 system so we could follow up with them regarding other questions they have. The question we asked ourselves was…
How can we connect our Dynamics 365 system with GoToWebinar without 3rd party software (or a developer)?
In our final design we decided to use an embedded GoToWebinar form on the landing page, so we knew that we had that action to work with as an input. There are marketing automation tools that include D365 and GTW integrations, however for this specific webinar those were not going to be an option for us.
Knowing that GoToWebinar has an API prompted us to ask the question of whether there is a MS Flow connector we could use. A quick search through the list of connectors showed that, in fact, yes there is a premium connector in beta that we could use.
Setting up the Flow
This process is fairly straightforward–the interface is mostly point and click, though (as we’ll see below) in some situations you’ll need to do some setup or investigation the source/target system. Below are the steps I followed.
Create a new Flow and choose the GoToWebinar trigger
Logging into Flow is based on your Office 365 account, by logging in at http://flow.microsoft.com. Once you’re logged in, create the new Flow using the Create from Blank option.

The new Flow automatically returns an option to select a trigger. This is where we search for the service (GoToWebinar).
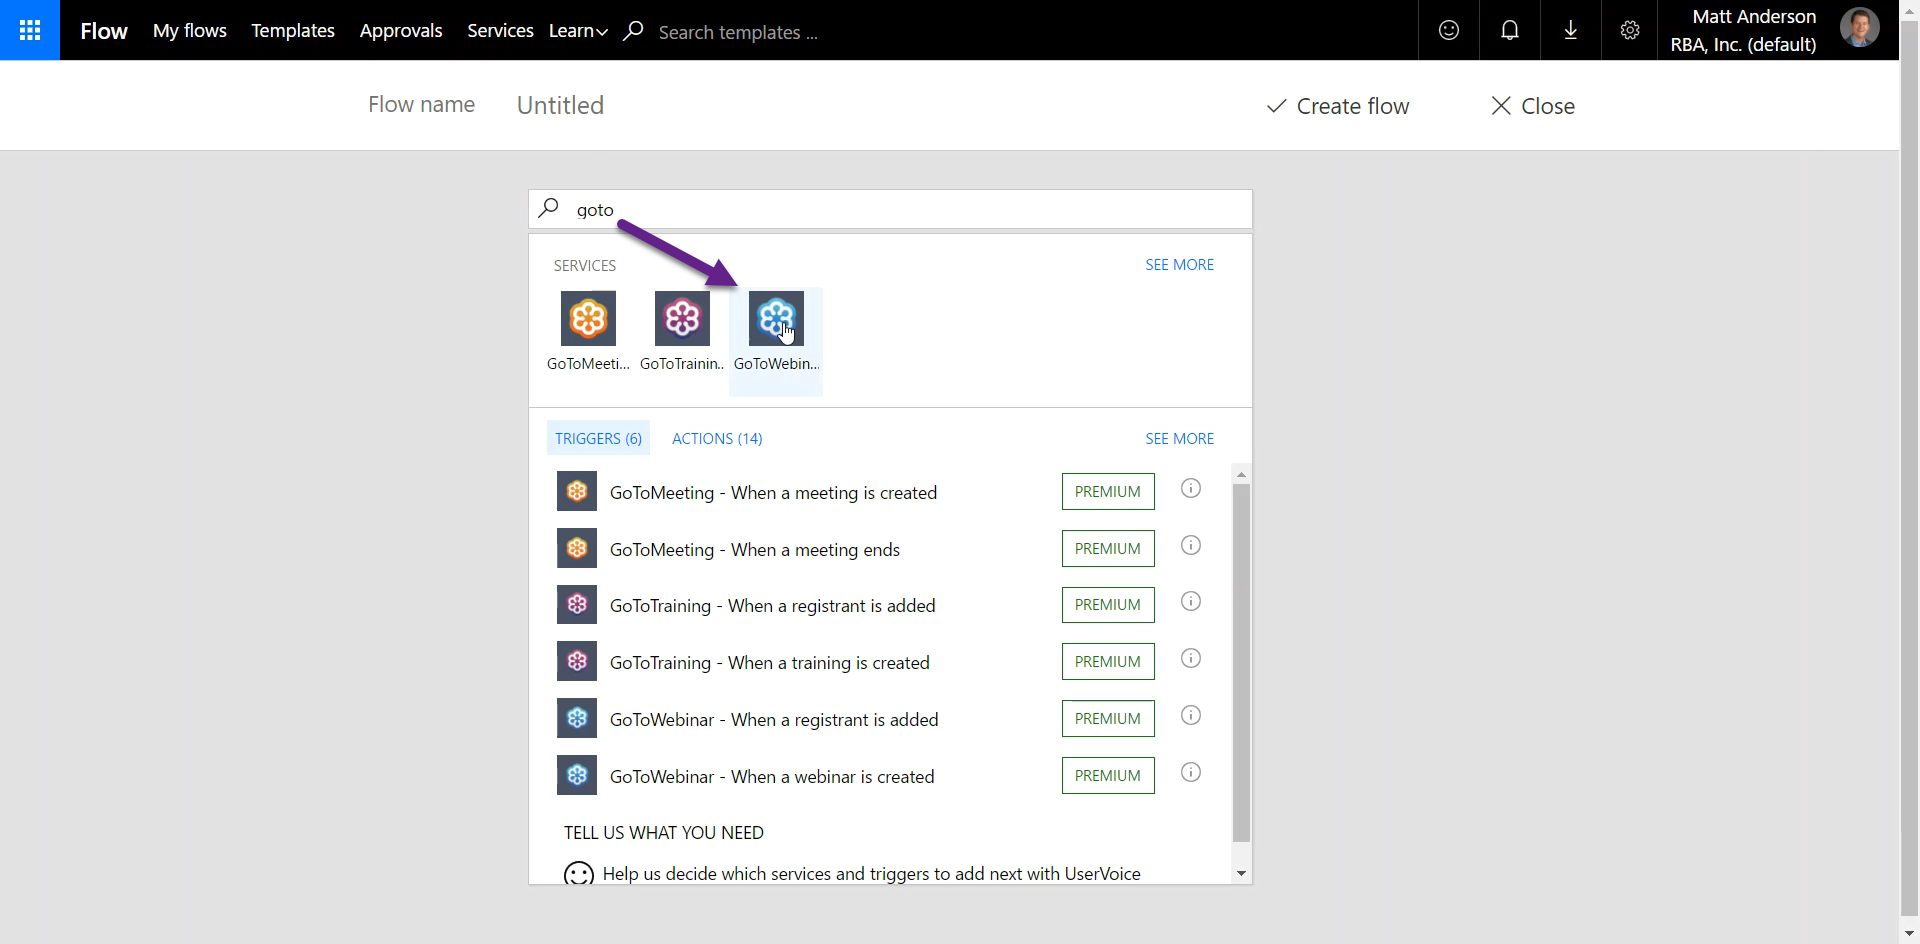
In the list, notice that this service is listed as “Premium”, which means it requires a premium MS Flow license associated with your user account. There’s a free trial available (45 days, which is enabled automatically) before you would be required to pay for the premium Flow license.
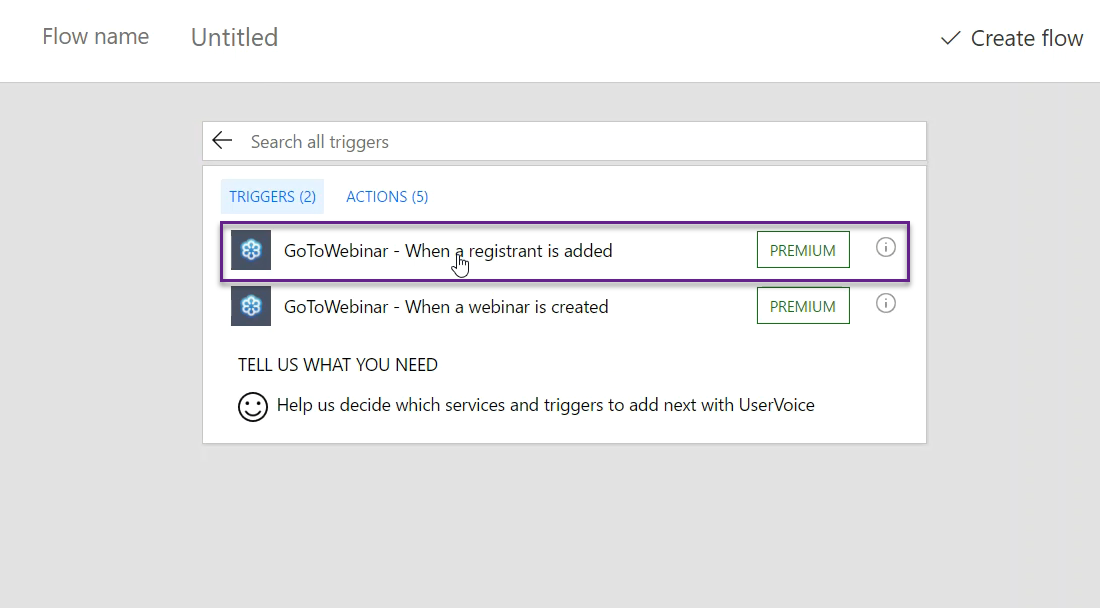
The trigger we used in this scenario is the “GoToWebinar – When a registrant is added” which will take action once it sees that a new registrant is added to a scheduled webinar.
Connect to the GoToWebinar service and set up the details
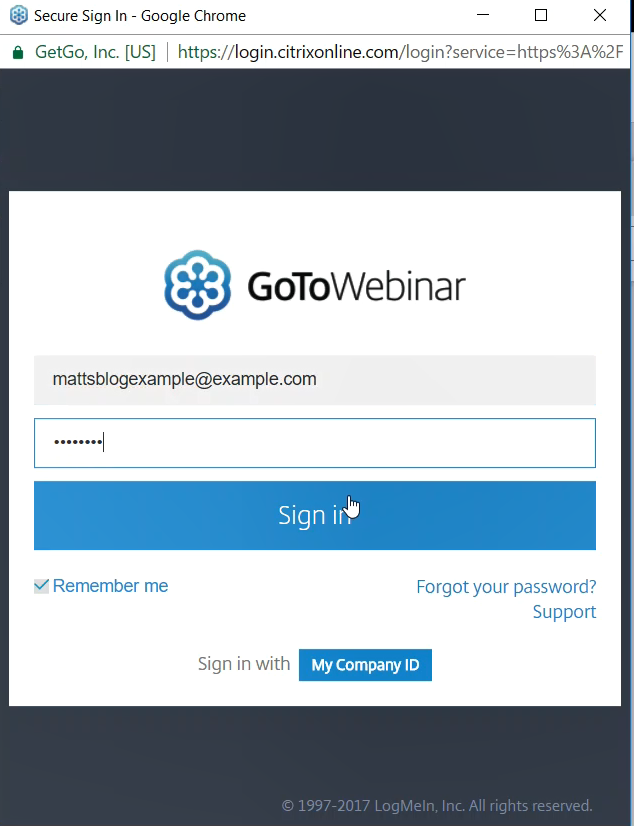
Now that the trigger has been set, it’s time to choose the specific webinar to monitor. To do this, I need to add my connection information by clicking the ellipsis then choosing Add new connection. A window pops open with the GoToWebinar login prompt.

Notice in the first screenshot that I already have one set up (the connection is listed in the row above). Flow allows multiple GoToWebinar accounts credentials to be stored, which we can choose between for each flow we create. This is a differentiator from other automation services I’ve worked with, which are typically limited to only one set of stored credentials per service.
Next, use the dropdown selector which will list out the scheduled webinars associated with the account.
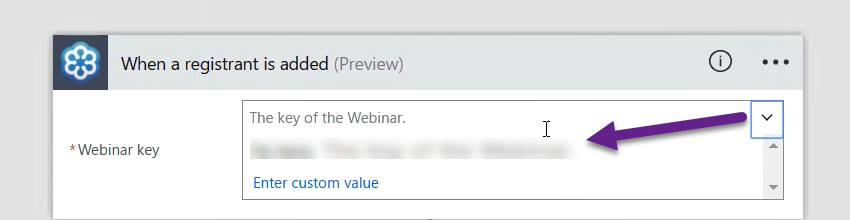
This took a little patience while waiting for the list to populate. As a backup plan, it’s possible to manually copy/paste in the unique ID of the webinar.
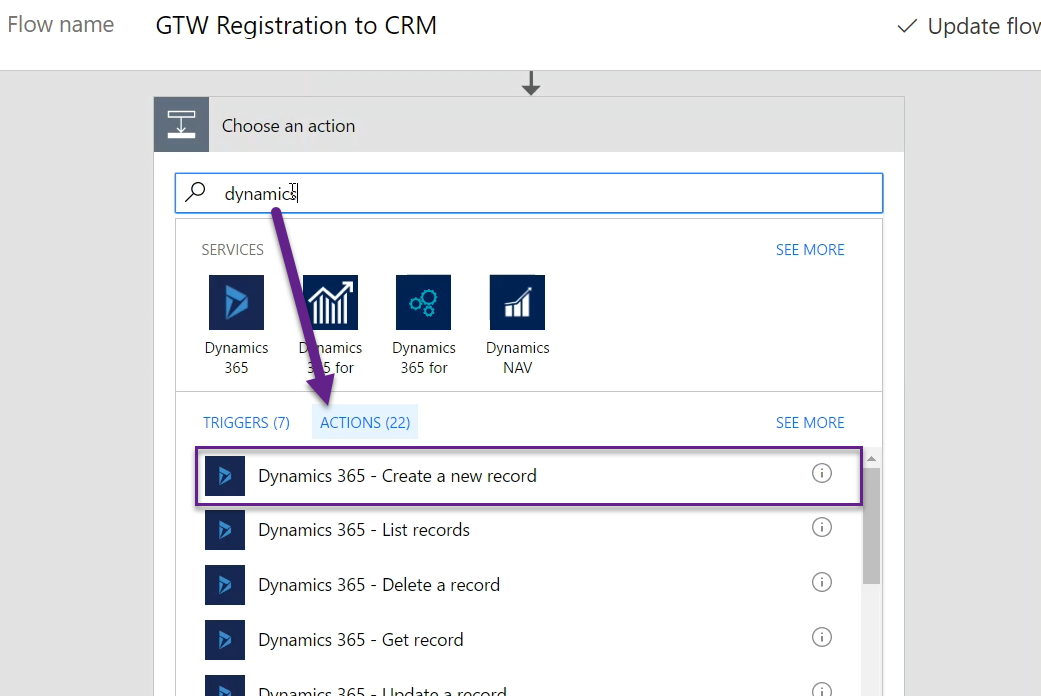
Set up the action to create the Lead in Dynamics 365
We begin by adding the next step following the trigger. For simplicity of this blog post, I’ll forgo any additional error handling, but for many scenarios it’s important to do validation of the data before creating the record in Dynamics.
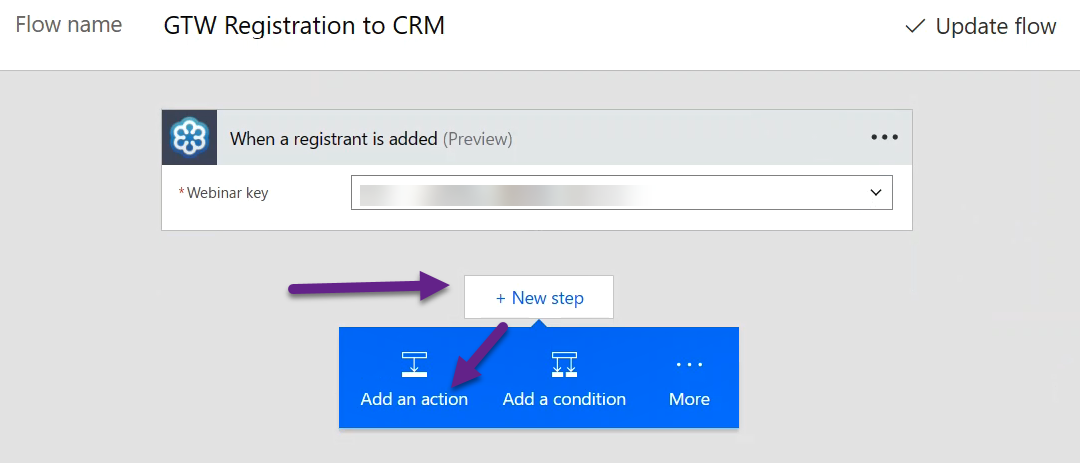
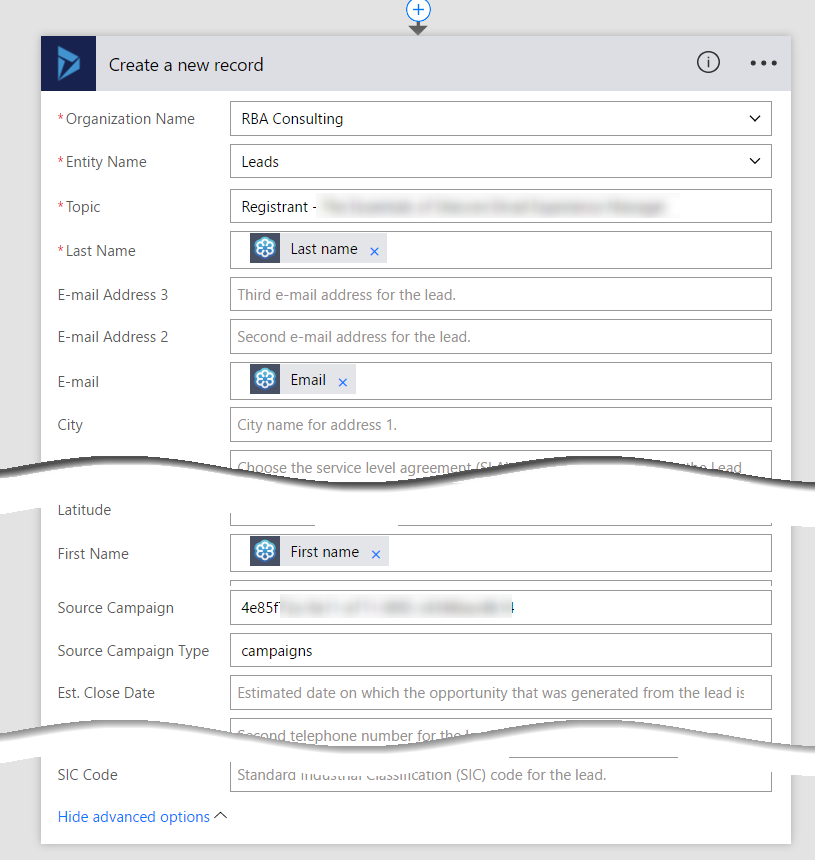
We want to add a Lead record to Dynamics 365 for each registrant, so we’ll choose the Dynamics 365 – Create a new record action.
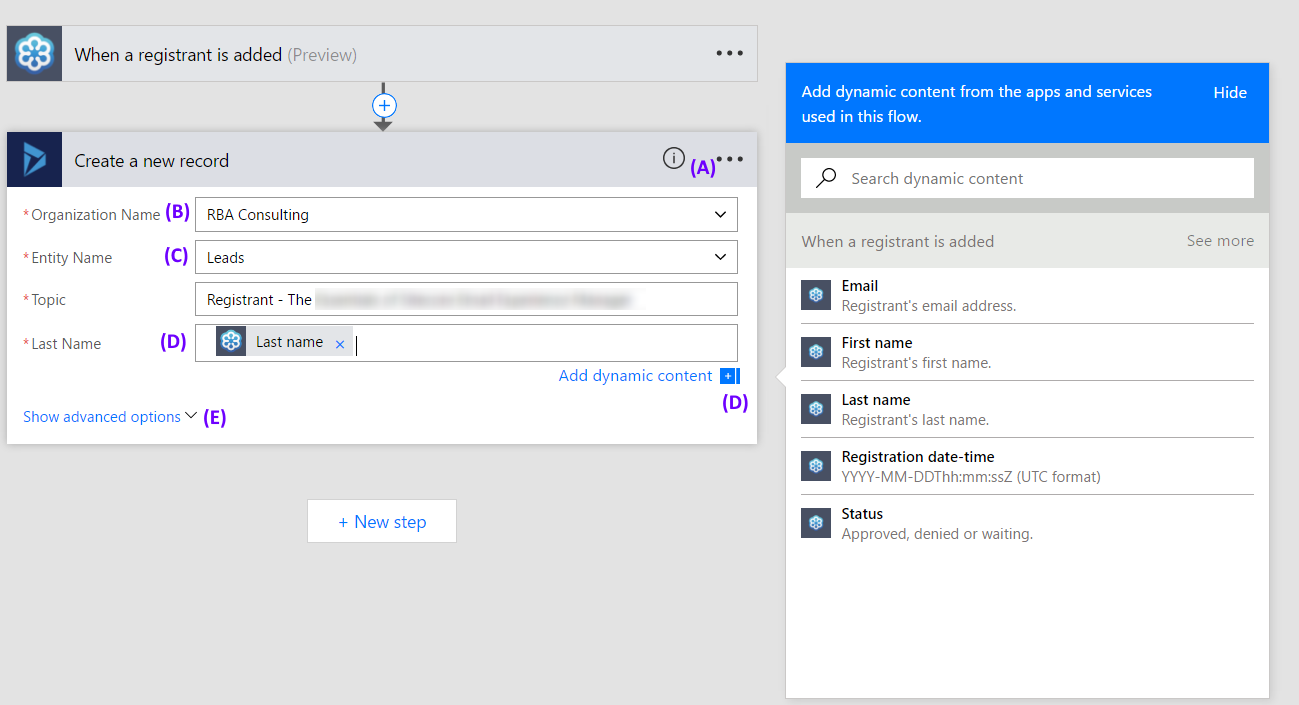
While filling in the details, there are a few things to keep in mind:
Dynamics connection:
(A) The ellipsis in the corner allows you to enable the connection based on your user account.
(B) Organization Name – this is where you choose which instance of Dynamics you are connecting to (such as a sandbox for testing or your production instance for the final Flow)
(C) Entity Name – the name of the entity, in our scenario, this is Lead
Required fields
-These are noted with a * and are based on field requirement level in Dynamics 365.
-This is the field definition only, ignoring any variation introduced by D365 Business Rules.
Dynamic content for setting field values
(D) Items identified in previous steps can be added via the context menu that shows up when a field is selected.
More fields
(E) Only a selection of fields are visible by default, click the Show Advanced Options link to see the full list of fields.
Dynamics 365 Lookup fields
-These required a little extra care because I was explicitly setting the value (via the GUID) rather than using dynamic content to first query for the appropriate Campaign.
The next screenshot shows the advanced options view with the full list of fields, where the lookup field components have been included.
Remember to be mindful of the fact that this flow will use your user account (and associated security) when connecting to Dynamics 365, but form-level configuration, client-side business rules, etc. are not carried through to the MS Flow interface.
Enable the Flow
The last step is to save and enable the flow. Set a creative name then click Create Flow (you know, just in case you haven’t already done it before this point). To enable the saved flow, navigate back to My Flows and flip the on/off switch.

Final Thoughts
As someone who has been involved with many different system integrations, I was pretty impressed by what was offered by MS Flow. We didn’t need to write any code. We didn’t need to do any system configuration in either the source (GTW) or target (D365). We didn’t need to install any special software. AND we had a working integration at the other end of it.
I’ll check back in with some “lessons learned” in a future blog post. If there are questions you have about the process above, please let me know in the comments and I can look to address them along with the lessons learned.